What is Zapier?
Zapier lets you connect an app to 2,000+ other web services. Zaps (set up in minutes with no coding) are workflows that automate your day-to-day tasks between apps. Each Zap has one app as the Trigger, where your information comes from and which causes one or more Actions in other apps, where your data gets sent automatically.How it works
1
Link Fillout to Zapier
First, log in to your Zapier account or create a new account. Then, hover over the left-hand panel and click 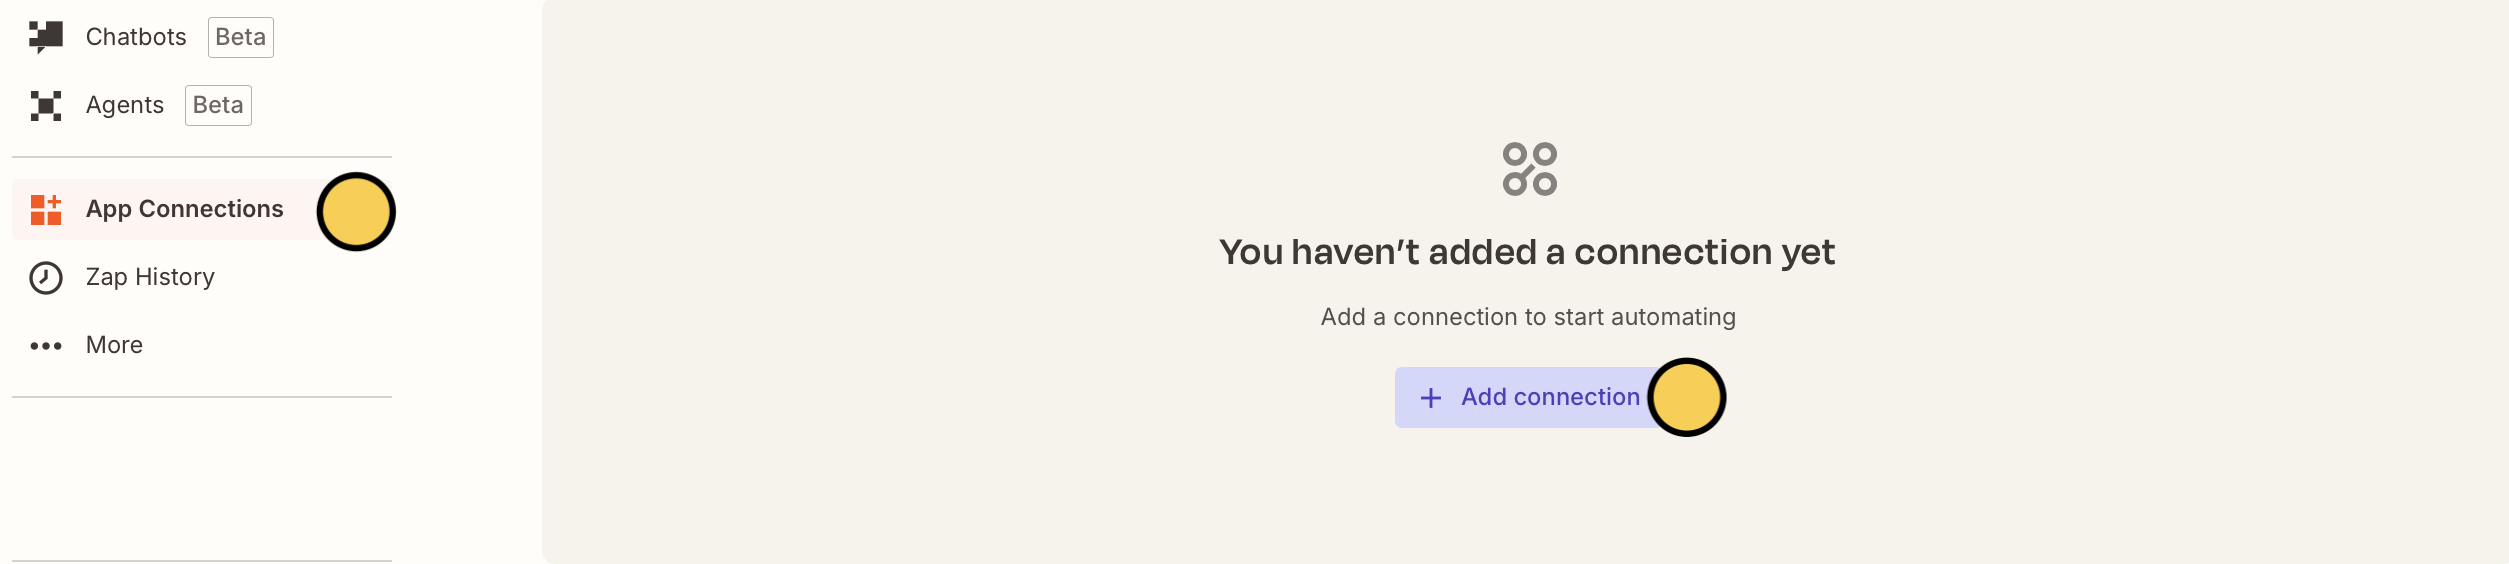
App Connections followed by + Add connection.2
Create a Zap
Use a pre-made Zap or create your own. Hover over the left-hand panel, and click 
Let’s select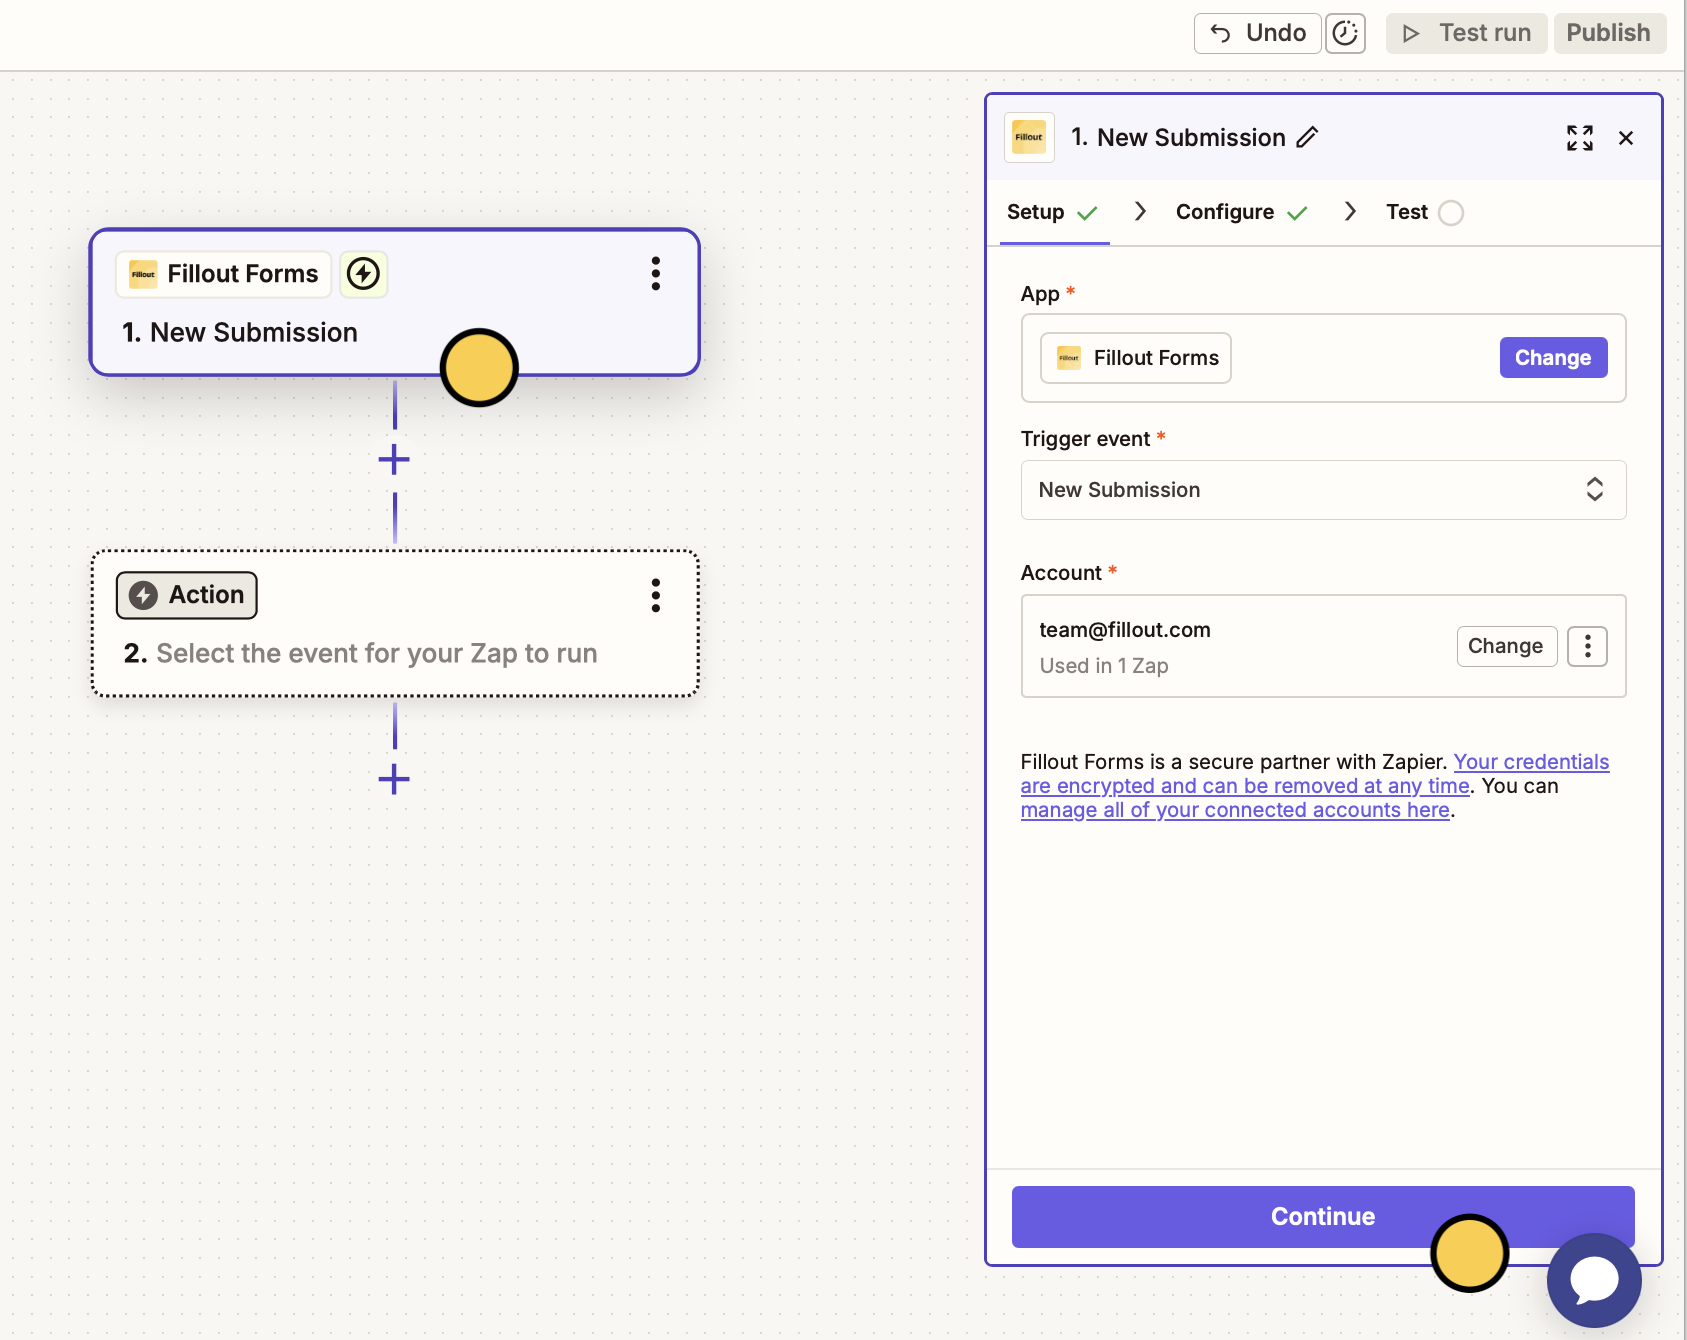
+ Create followed by Zaps.Let’s select
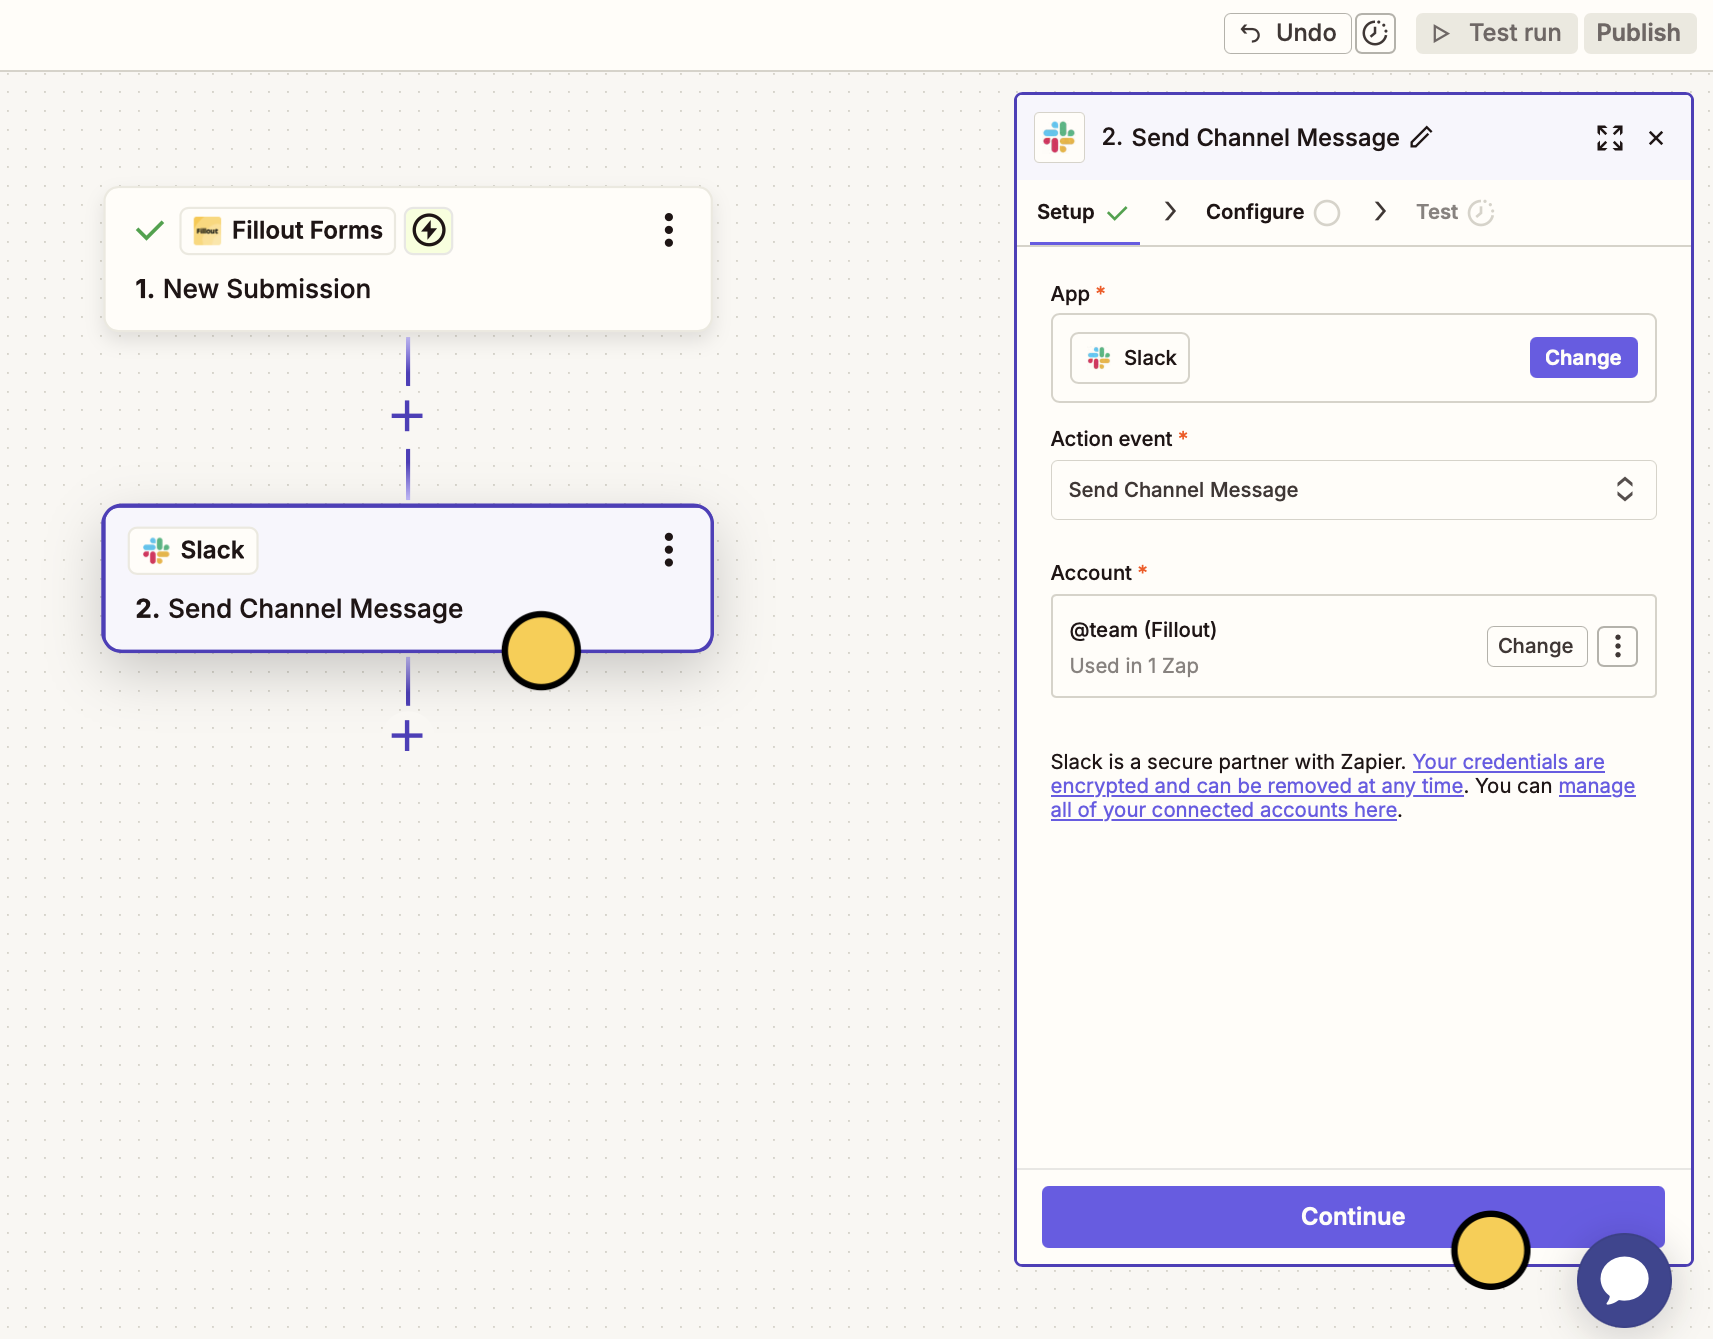
Fillout Forms as the trigger app. By default, the automation will start after receiving New submissions.Continue to choose a Fillout Form.For our next app, we’ll choose Slack and Send Channel Message as the Action event from the right side.Continue to select a Slack Channel and configure other settings.3
Edit Message Text
You can send the same fixed message (e.g., New ticket received) for submissions received or send each respondent’s answers. To do this, map fields by clicking and selecting them in the left dropdown.
4
Test your automation
Click
Test run on the upper right corner to make sure everything’s working as intended.5
Publish zap
Once everything’s set click
Publish on the upper right corner. Now, all new submissions will be sent to the Slack channel.