> ## Documentation Index
> Fetch the complete documentation index at: https://fillout.com/help/llms.txt
> Use this file to discover all available pages before exploring further.

# Select and filter Airtable linked records in a dropdown

> Let respondents select Airtable linked records from a Fillout form. Optionally filter records based on prior inputs.

export const SupportBanner = () => {
  const titleId = React.useId();
  return <div className="support-banner" role="region" aria-labelledby={titleId}>
      <span className="support-banner__ring support-banner__ring--outer" aria-hidden="true" />
      <span className="support-banner__ring support-banner__ring--middle" aria-hidden="true" />
      <span className="support-banner__ring support-banner__ring--inner" aria-hidden="true" />
      <span className="support-banner__ring support-banner__ring--center" aria-hidden="true" />

      <div className="support-banner__content">
        <div className="support-banner__title" id={titleId} role="heading" aria-level="2">Still have questions?</div>

        <div className="support-banner__copy">
          <span className="support-banner__line">Our team is happy to help. Start a live chat using the</span>
          <span className="support-banner__line">
            chat bubble <span className="support-banner__chat-icon" aria-hidden="true" /> in the bottom right, or email us at
          </span>
          <span className="support-banner__line">
            <a href="mailto:support@fillout.com">support{'@'}fillout.com</a>
          </span>
        </div>

        <a className="support-banner__cta" href="mailto:support@fillout.com">Contact us</a>
      </div>
    </div>;
};

## Video tutorial

In Fillout, you can even filter which records a respondent is choosing from. Here's how.

<iframe width="100%" height="420" src="https://www.loom.com/embed/0b693e23011647ff880973b55489a16b" title="Select & Filter Airtable Linked Records in a Dropdown" frameborder="0" allow="accelerometer; autoplay; clipboard-write; encrypted-media; gyroscope; picture-in-picture; web-share" referrerpolicy="strict-origin-when-cross-origin" allowFullScreen />

## Enable dropdown filtering

<Steps>
  <Step title="Create a linked record picker field">
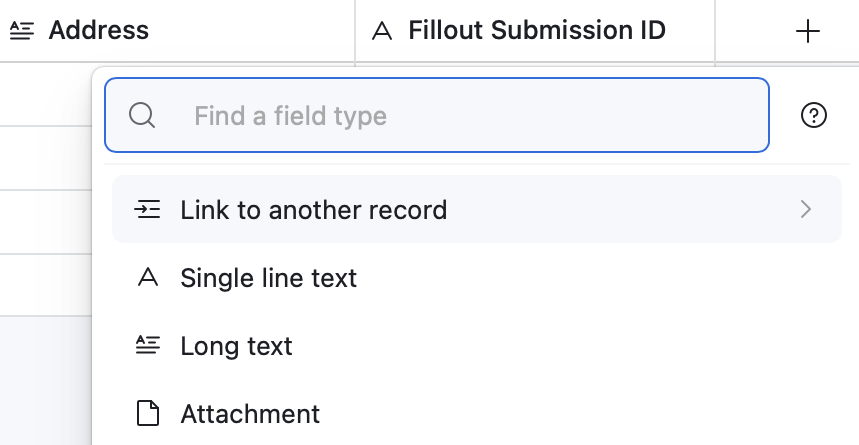
    On the Airtable base you plan to write or update, click `+` followed by `Link to another record`.
    <img src="https://mintcdn.com/fillout-005a867b/UD9ro_N_R6GH2wl_/images/Screenshot2025-11-10at11.19.37AM.png?fit=max&auto=format&n=UD9ro_N_R6GH2wl_&q=85&s=9f7f902eff449057cd8433759a1f3624" alt="Screenshot 2025-11-10 at 11.19.37 AM.png" title="Screenshot 2025-11-10 at 11.19.37 AM.png" style={{ width:"52%" }} width="859" height="445" data-path="images/Screenshot2025-11-10at11.19.37AM.png" />
  </Step>

  <Step title="Connect to Airtable">
    Click `Integrate` on the top menu followed by `Airtable`. Then, choose your **base** and **table**.
  </Step>

  <Step title="Add the field to your form">
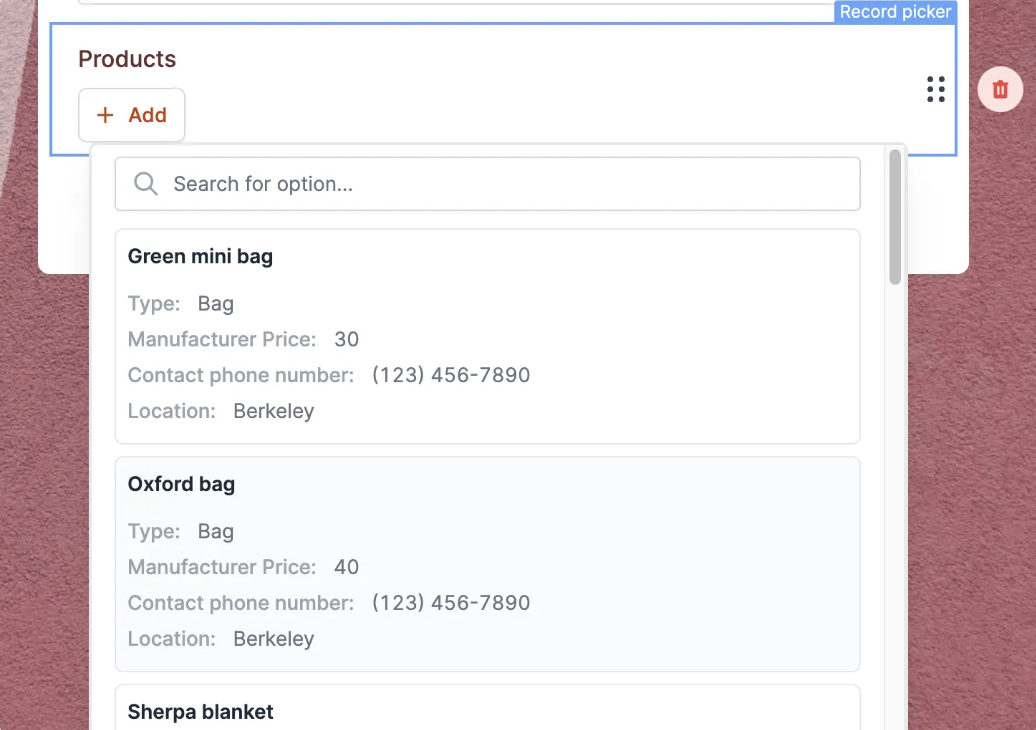
    On the left-hand panel, drag and drop the linked record picker field onto your form. You'll immediately be able to pick from records in that associated table.
    <img src="https://mintcdn.com/fillout-005a867b/S51fcTwdhWah2VpJ/images/Screenshot2025-05-15at7.57.06PM.png?fit=max&auto=format&n=S51fcTwdhWah2VpJ&q=85&s=4e83fe68ddfefe6ca17892e8deb7692a" alt="Screenshot of the Form designer tab of a form" style={{ width:"75%" }} width="1036" height="730" data-path="images/Screenshot2025-05-15at7.57.06PM.png" />
  </Step>

  <Step title="Add filters">
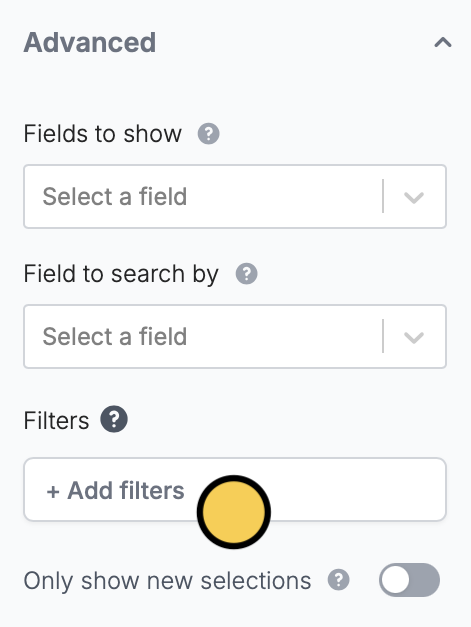
    Click the field's <Icon icon="gear-complex" iconType="solid" /> to open the right-hand panel. Scroll down to **Advanced** to `+ Add filters`.
    <img src="https://mintcdn.com/fillout-005a867b/UD9ro_N_R6GH2wl_/images/Screenshot2025-11-10at11.54.52AM.png?fit=max&auto=format&n=UD9ro_N_R6GH2wl_&q=85&s=9c7ab546eaf07e45a02360095936b754" alt="Screenshot 2025-11-10 at 11.54.52 AM.png" title="Screenshot 2025-11-10 at 11.54.52 AM.png" style={{ width:"30%" }} width="471" height="627" data-path="images/Screenshot2025-11-10at11.54.52AM.png" />
  </Step>

  <Step title="Publish and share">
    `Publish` your form to make the changes reflect.
  </Step>
</Steps>

## Additional custom options

Now, you can customize this field with many options like:

* Allow respondents to create new entries in a new (customizable) form
* Allow selecting multiple linked records
* Select which fields to show (can show images!)
* Limit to a view
* Pick which field to search by
* Filter which records to show based on form inputs or dynamic data
* And many more!

## Related articles

<CardGroup cols={3}>
  <Card title="Create new linked records" icon="files-medical" iconType="regular" color="#FFC738" href="/help/create-new-linked-records">
    Let respondents create records from your form.
  </Card>

  <Card title="Update Airtable records" icon="arrow-rotate-right" iconType="regular" color="#FFC738" href="/help/airtable-update-form">
    Edit existing records and pre-fill fields.
  </Card>

  <Card title="Working with linked record pickers" icon="folder-medical" iconType="regular" color="#FFC738" href="/help/record-pickers">
    Set pre-fills, reference fields, and more.
  </Card>
</CardGroup>

<SupportBanner />
