> ## Documentation Index
> Fetch the complete documentation index at: https://fillout.com/help/llms.txt
> Use this file to discover all available pages before exploring further.
# Payment page
> Collect one-time, subscription payments, and user-defined amount via card, link wallet, US bank account, or Affirm with a Stripe-powered payment page. Set a dynamic product name and purchase amount based on user input, and optionally send a receipt.
## How to add a payment page
Click `+ Add page` and choose **Payment**.
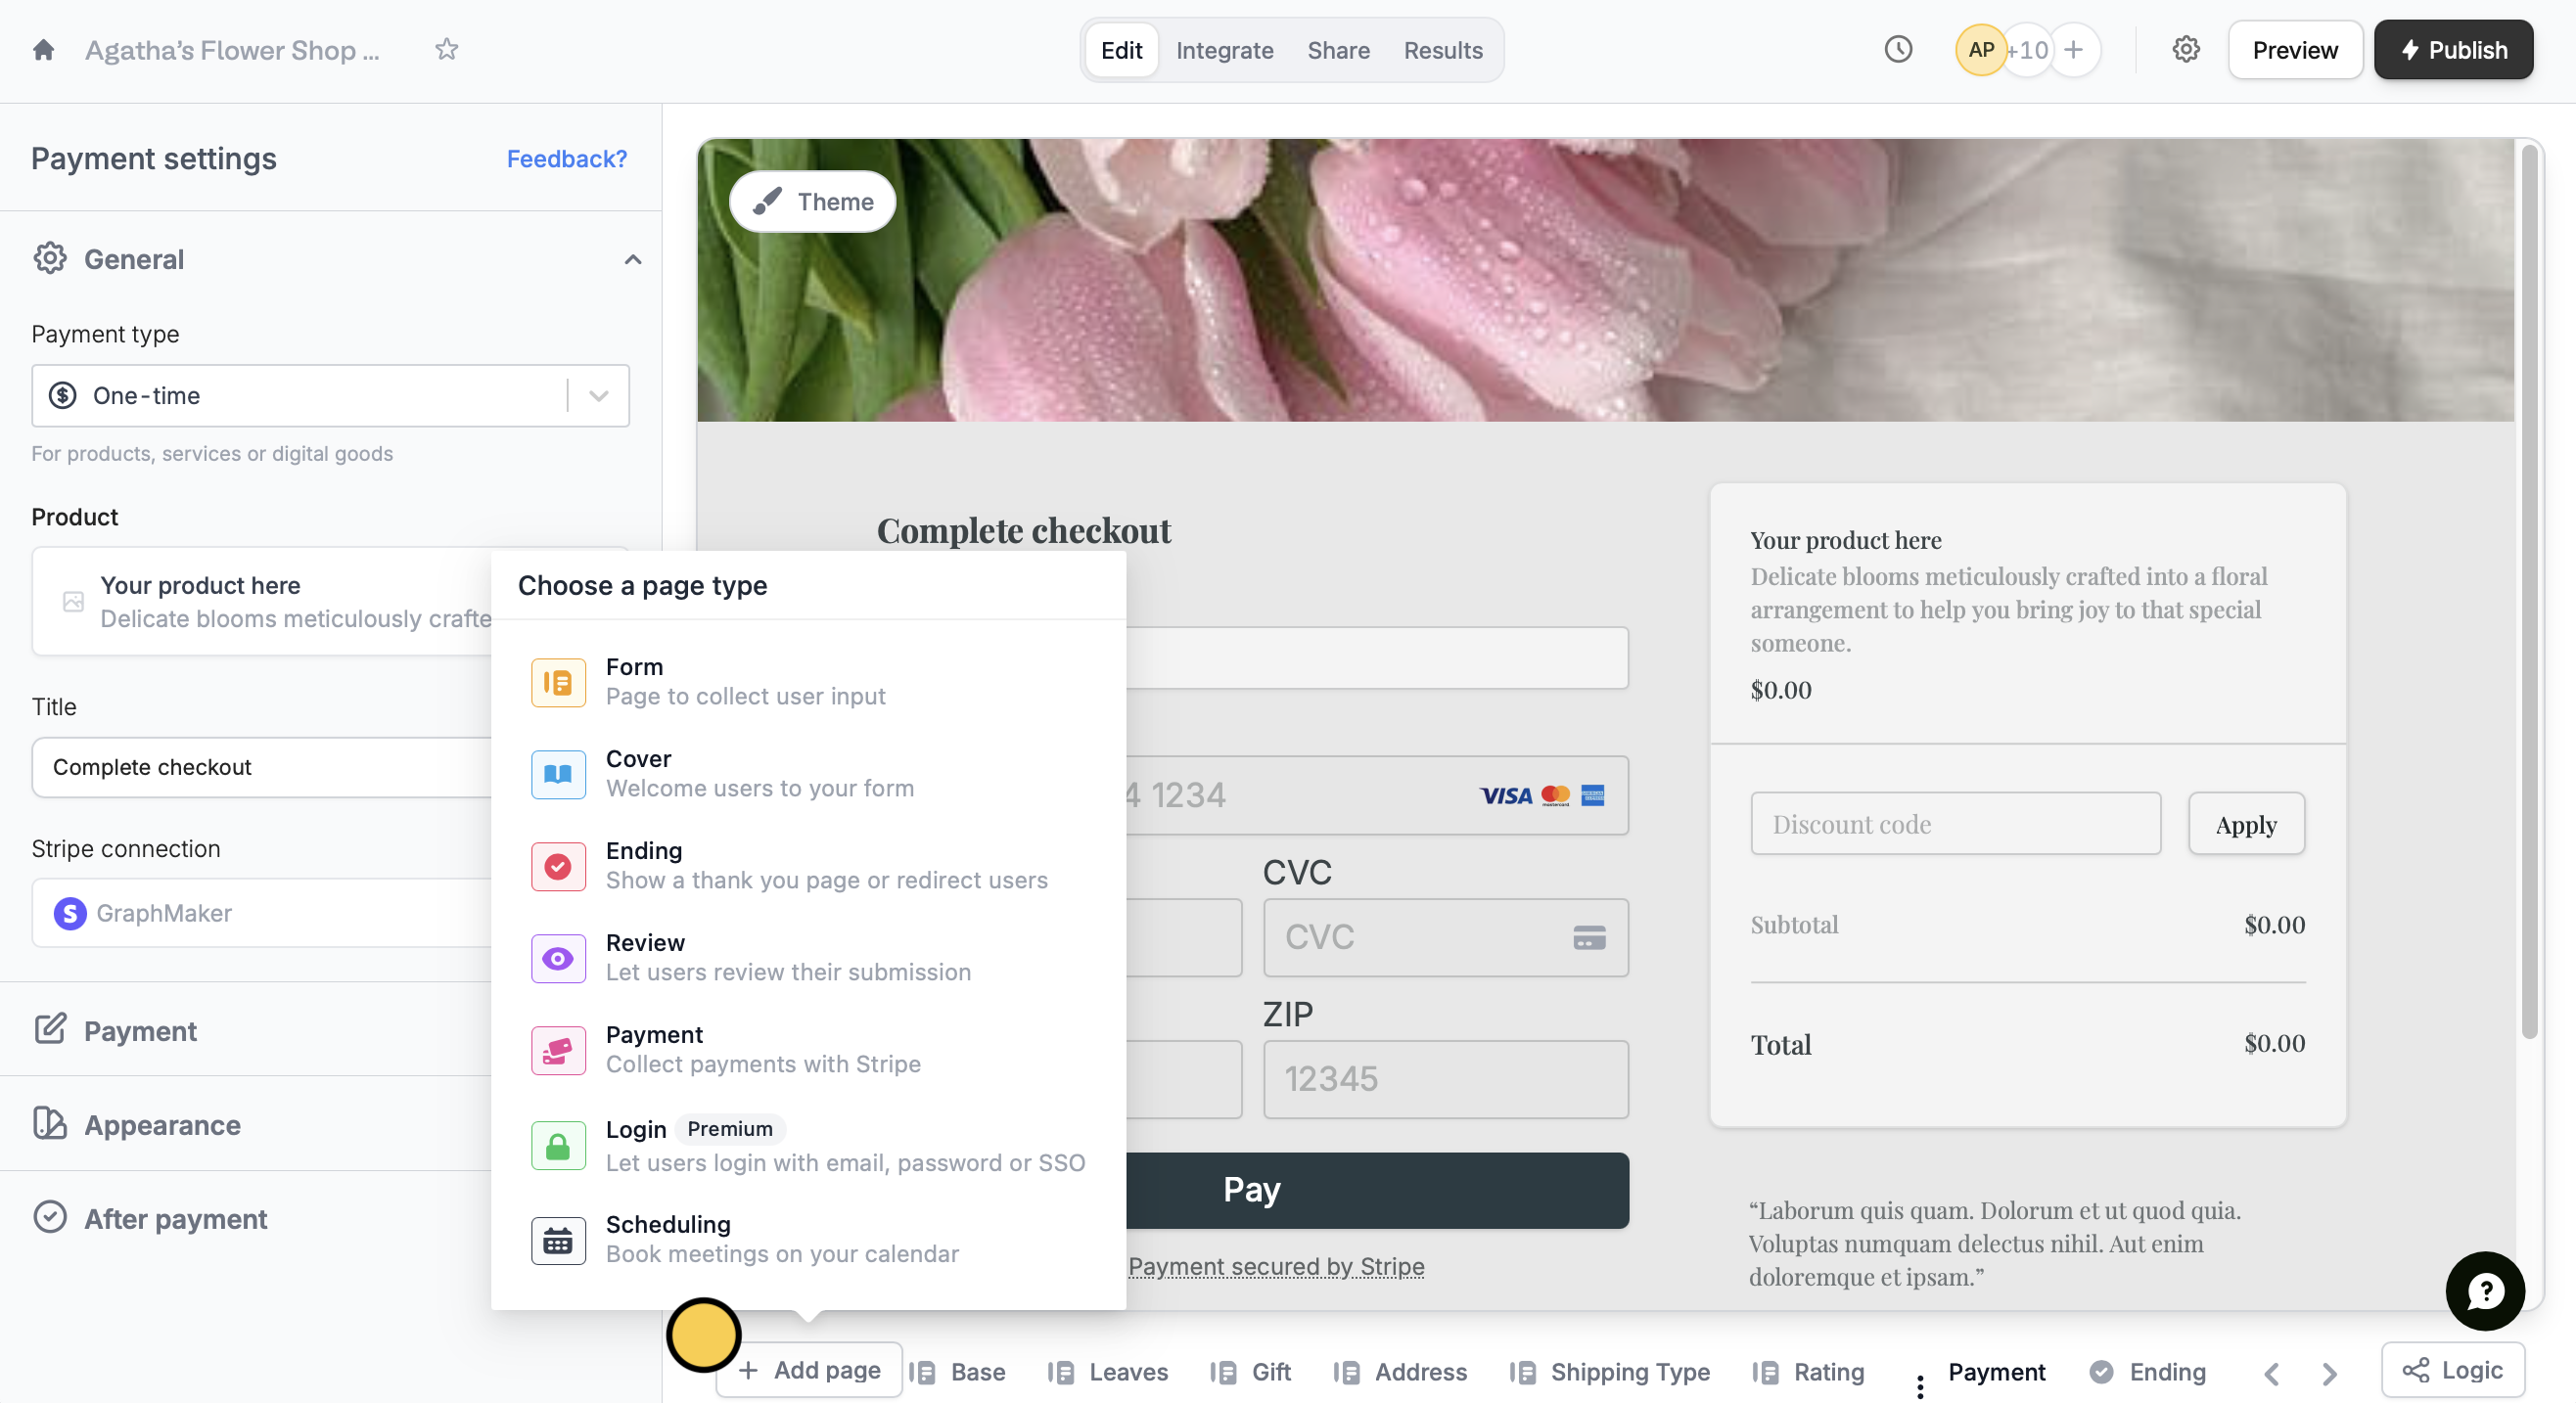 Select between the following types:
* **One-time** - for single, non-recurring transactions
* **Subscription** - for recurring transactions usually with a fixed price
* **Pay what you want** - leave the amount up to the customer
Payment pages can be added anywhere in your form and are available on all plans with no additional fees charged to use the feature. However, usual Stripe fees such as transaction costs still apply.
Add the details of your payment page and `Connect to Stripe`. From here you can choose the currency, and make the price and product name [dynamic](/fetch-dynamic-data) by clicking or typing **@** to reference a specific field.
Select between the following types:
* **One-time** - for single, non-recurring transactions
* **Subscription** - for recurring transactions usually with a fixed price
* **Pay what you want** - leave the amount up to the customer
Payment pages can be added anywhere in your form and are available on all plans with no additional fees charged to use the feature. However, usual Stripe fees such as transaction costs still apply.
Add the details of your payment page and `Connect to Stripe`. From here you can choose the currency, and make the price and product name [dynamic](/fetch-dynamic-data) by clicking or typing **@** to reference a specific field.
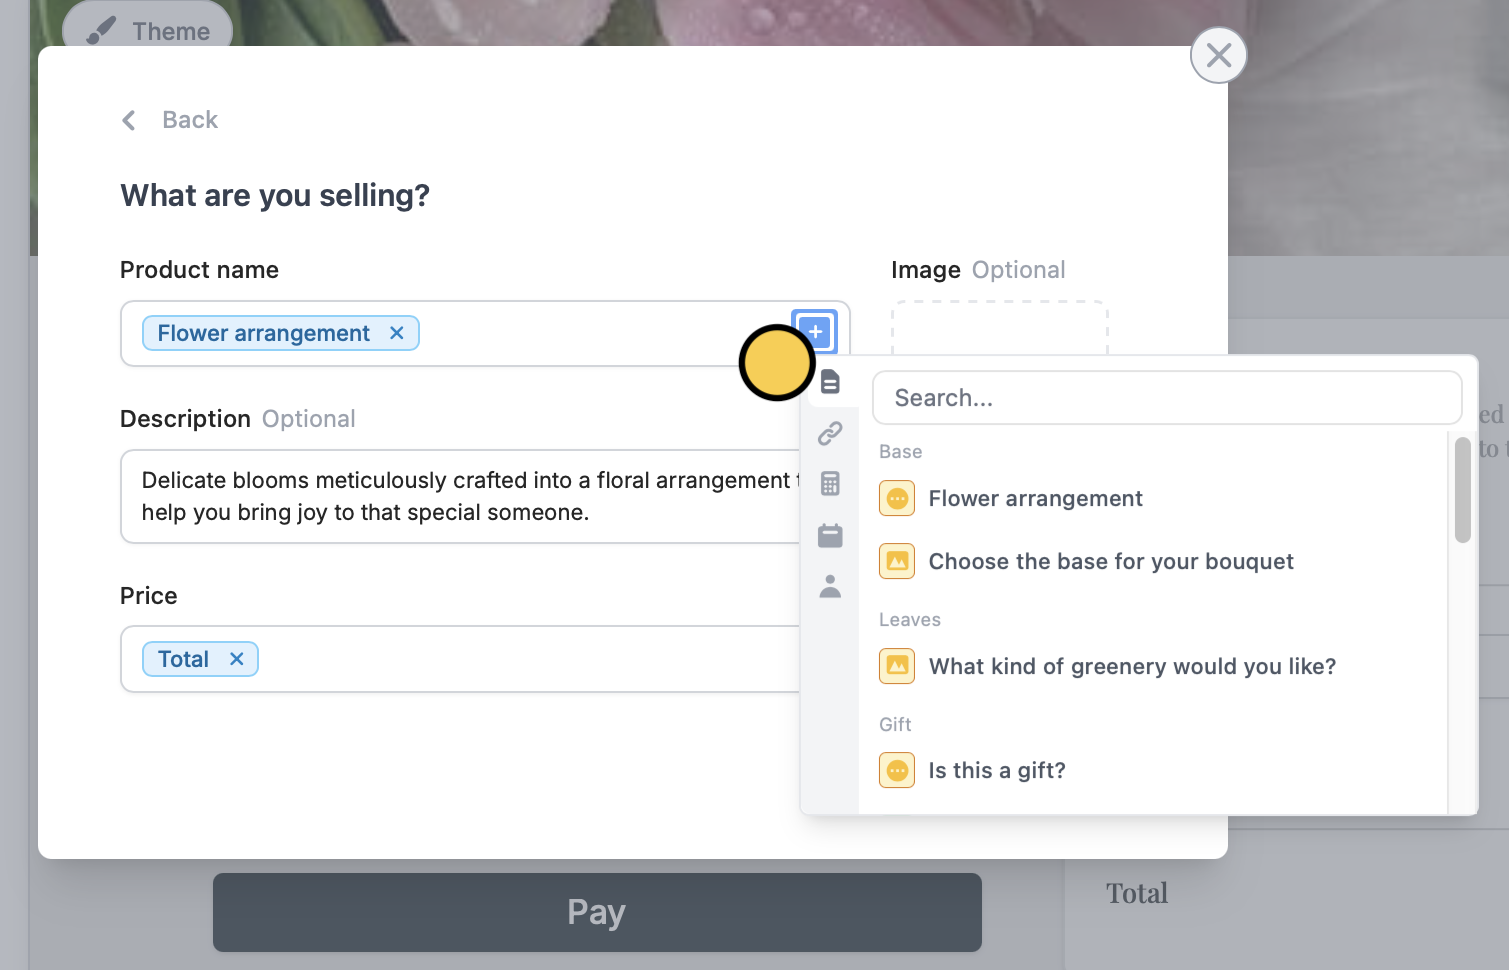 In this example, the product name and price will change per customer depending on their order.
The default payment method in new forms is through a card. You can give more options to your customers by adding more **Payment** methods through the left-hand panel.
Fillout doesn't support automatically adding VAT to the prices, even if the option is enabled in your Stripe account. You can use [calculations](/calculations) to obtain a price with taxes included, and then [use that calculation as the price](/dynamic-payment) in the payment page.
That’s it! Click `Preview` to try out your form. Payments will only be collected when you `Publish` the form and send its link.
You can test your live form without getting charged. Create a 100% off coupon in Stripe, then enable the "[Discount Codes](https://www.fillout.com/help/payment-page#add-discount-codes)" option to apply it during checkout. Once testing is done, just toggle the discount codes back off.
## Customize payment settings
On the left-hand panel, you can:
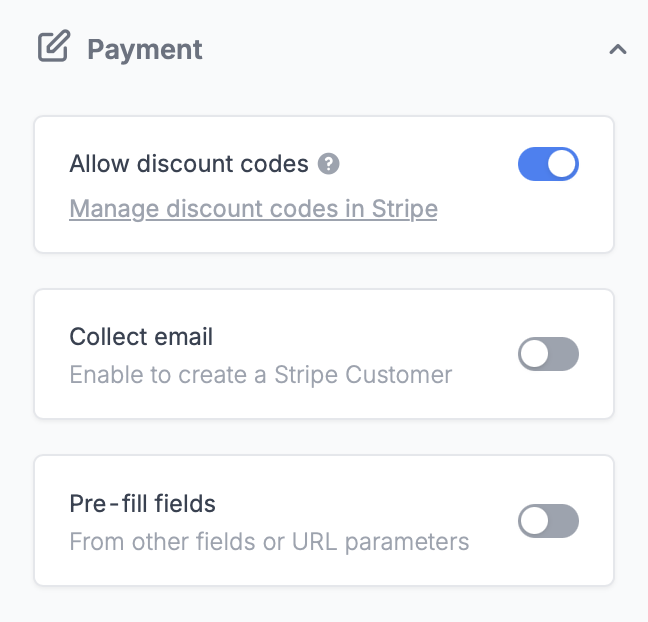
* **Allow discount codes** - add a new code or link an existing one to your form by clicking `Manage discount codes in Stripe`
* **Collect email** - to create a new customer on your Stripe account
* **Pre-fill fields** - automatically fill out the fields of your payment form
In this example, the product name and price will change per customer depending on their order.
The default payment method in new forms is through a card. You can give more options to your customers by adding more **Payment** methods through the left-hand panel.
Fillout doesn't support automatically adding VAT to the prices, even if the option is enabled in your Stripe account. You can use [calculations](/calculations) to obtain a price with taxes included, and then [use that calculation as the price](/dynamic-payment) in the payment page.
That’s it! Click `Preview` to try out your form. Payments will only be collected when you `Publish` the form and send its link.
You can test your live form without getting charged. Create a 100% off coupon in Stripe, then enable the "[Discount Codes](https://www.fillout.com/help/payment-page#add-discount-codes)" option to apply it during checkout. Once testing is done, just toggle the discount codes back off.
## Customize payment settings
On the left-hand panel, you can:
* **Allow discount codes** - add a new code or link an existing one to your form by clicking `Manage discount codes in Stripe`
* **Collect email** - to create a new customer on your Stripe account
* **Pre-fill fields** - automatically fill out the fields of your payment form
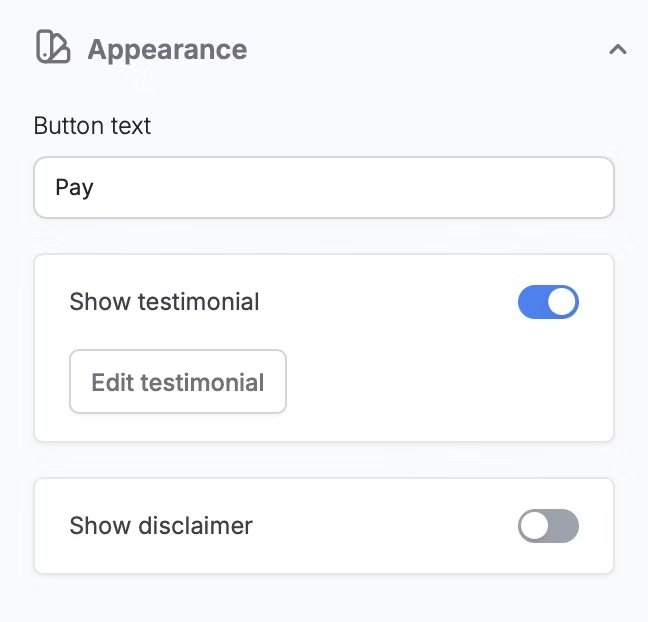
 * **Show testimonial** - to help increase checkout rates
* **Show disclaimer** - to clarify terms and reduce disputes over returns, shipping, and other necessary info
* **Show testimonial** - to help increase checkout rates
* **Show disclaimer** - to clarify terms and reduce disputes over returns, shipping, and other necessary info
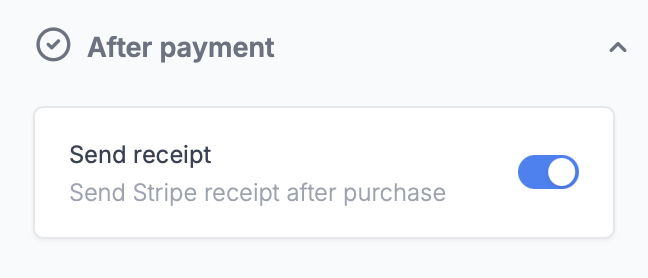
 * **Send Stripe receipt** - after a successful purchase. Be sure to enabled the [collect email](https://www.fillout.com/help/payment-page#create-a-new-stripe-customer) switch.
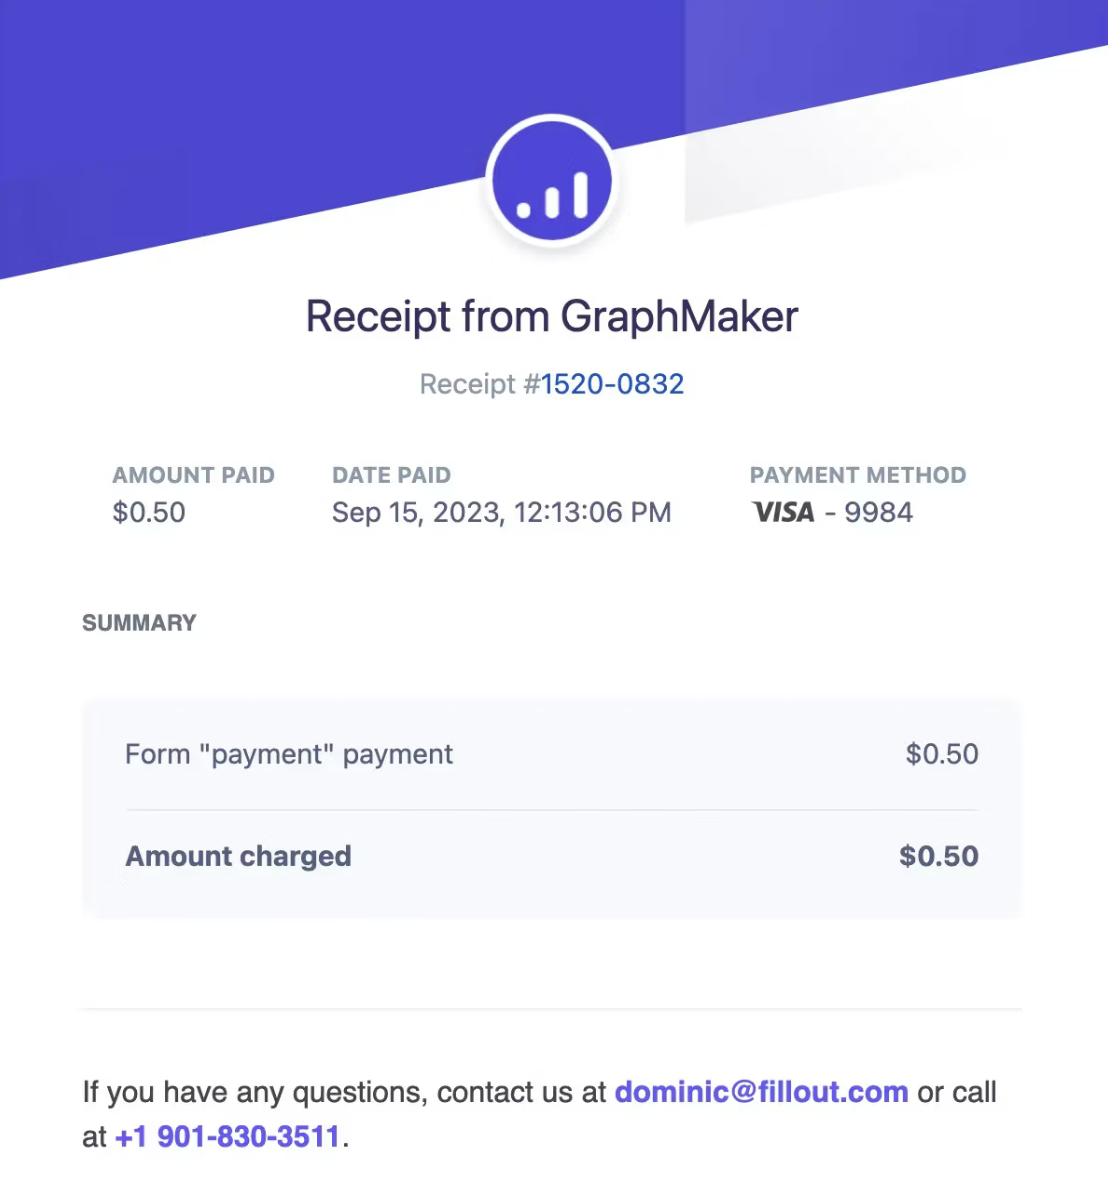
 Here's a sample of what it would look like. Note that receipts are not sent in Fillout preview mode.
 ## Reference the payment intent ID in integrations
You can save the Stripe payment ID to the integration of your choice by referencing it. Go to `Integrate` from the top menu and choose a platform.
Under **Mappings**, click `+ Add new` and look for **Stripe Payment ID.**
## Reference the payment intent ID in integrations
You can save the Stripe payment ID to the integration of your choice by referencing it. Go to `Integrate` from the top menu and choose a platform.
Under **Mappings**, click `+ Add new` and look for **Stripe Payment ID.**
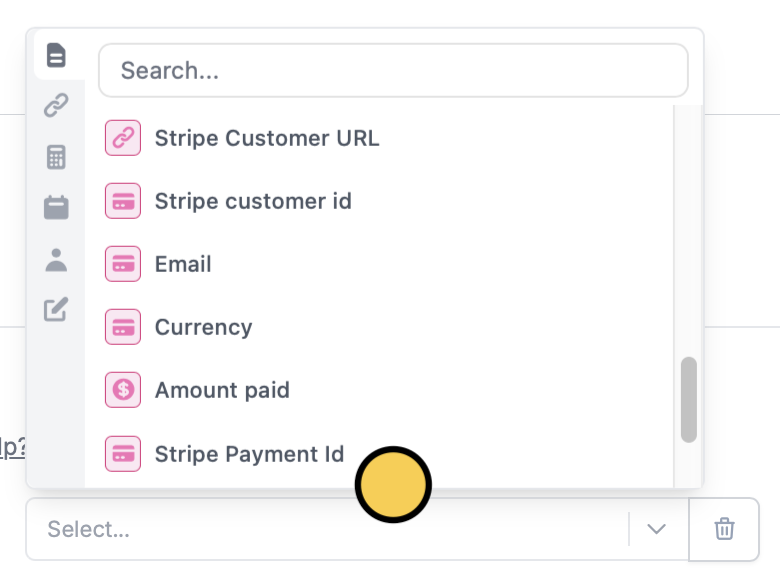 Stripe payment ids will look like "pi\_3MKECGFiethEjGwr1TWmQ0rN" and allow you to tie a form submission to an actual payment in Stripe.
## Related articles
Auto-update product and price by order.
Calculate prices, compute scores, and more.
Hide or show fields based on answers, URL parameters or data.
Stripe payment ids will look like "pi\_3MKECGFiethEjGwr1TWmQ0rN" and allow you to tie a form submission to an actual payment in Stripe.
## Related articles
Auto-update product and price by order.
Calculate prices, compute scores, and more.
Hide or show fields based on answers, URL parameters or data.