> ## Documentation Index
> Fetch the complete documentation index at: https://fillout.com/help/llms.txt
> Use this file to discover all available pages before exploring further.
# Using Logged-in Data in Your Form
export const SupportBanner = () => {
const titleId = React.useId();
return ;
};
## How it works
If your form includes a [**login page**](https://www.fillout.com/help/login-page) **connected to a database**, you can use data from the logged-in respondent or user throughout your form.
Once a respondent logs in, all of their data from the connected table becomes available for use. This allows you to create more personalized, dynamic, and controlled form experiences.
You can use logged-in user data in:
* **Answer piping** - to personalize text in the form
* **Logic conditions** - show or hide fields or skip pages
* **Record picker filters** - to limit linked records that can be selected
* **Prefetches** - to auto-load existing user data
* **Calculations** - to use user data in formulas
* **Prefilling fields** - to auto-fill form fields
* **Workflows and integrations** - map data directly and personalize notifications
## How to use logged-in data
Navigate to your **login page**. On the left-hand panel, toggle [Connect to database](https://www.fillout.com/help/login-page#connect-to-a-database).
Depending on your setup, the reference menu may appear automatically. If not, type **@** or click the `plus icon` .
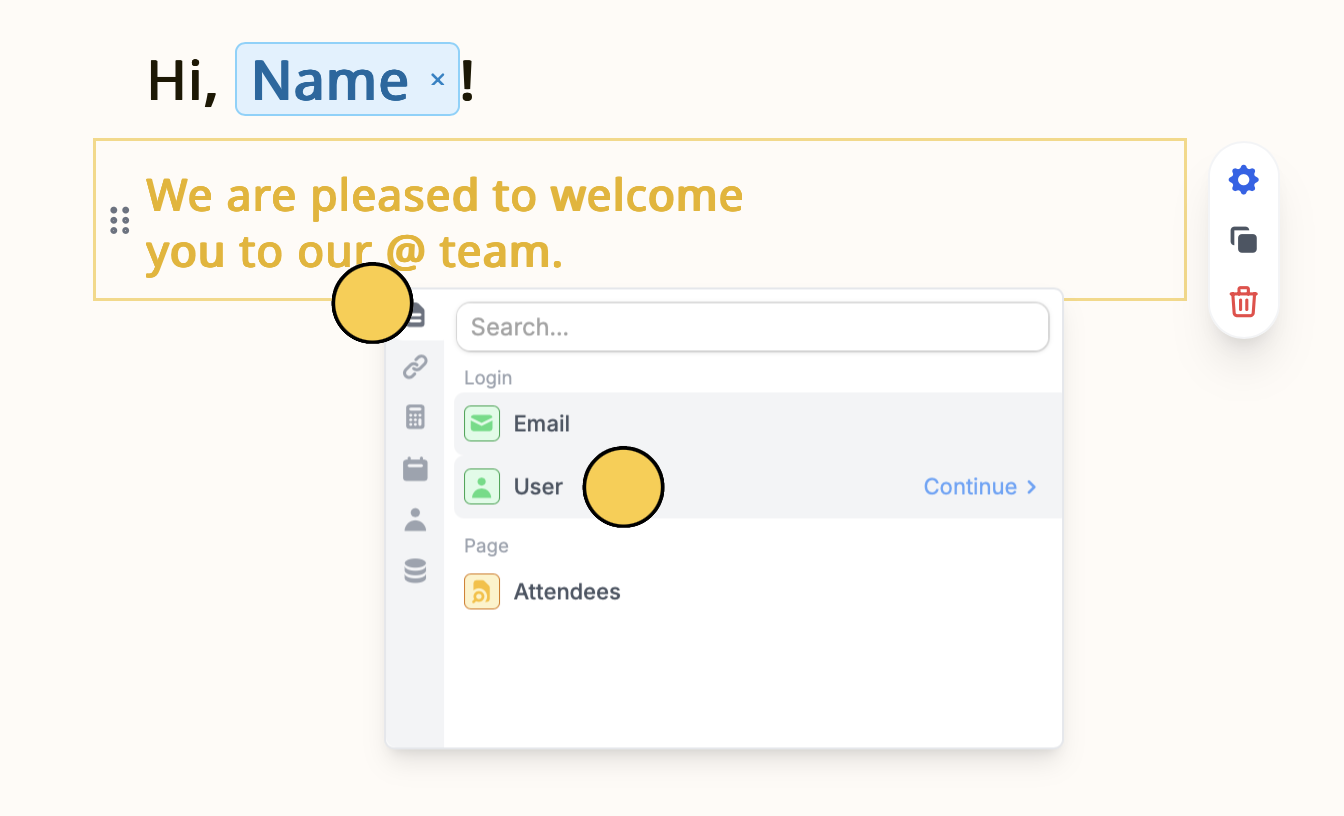 Then, click **User**.
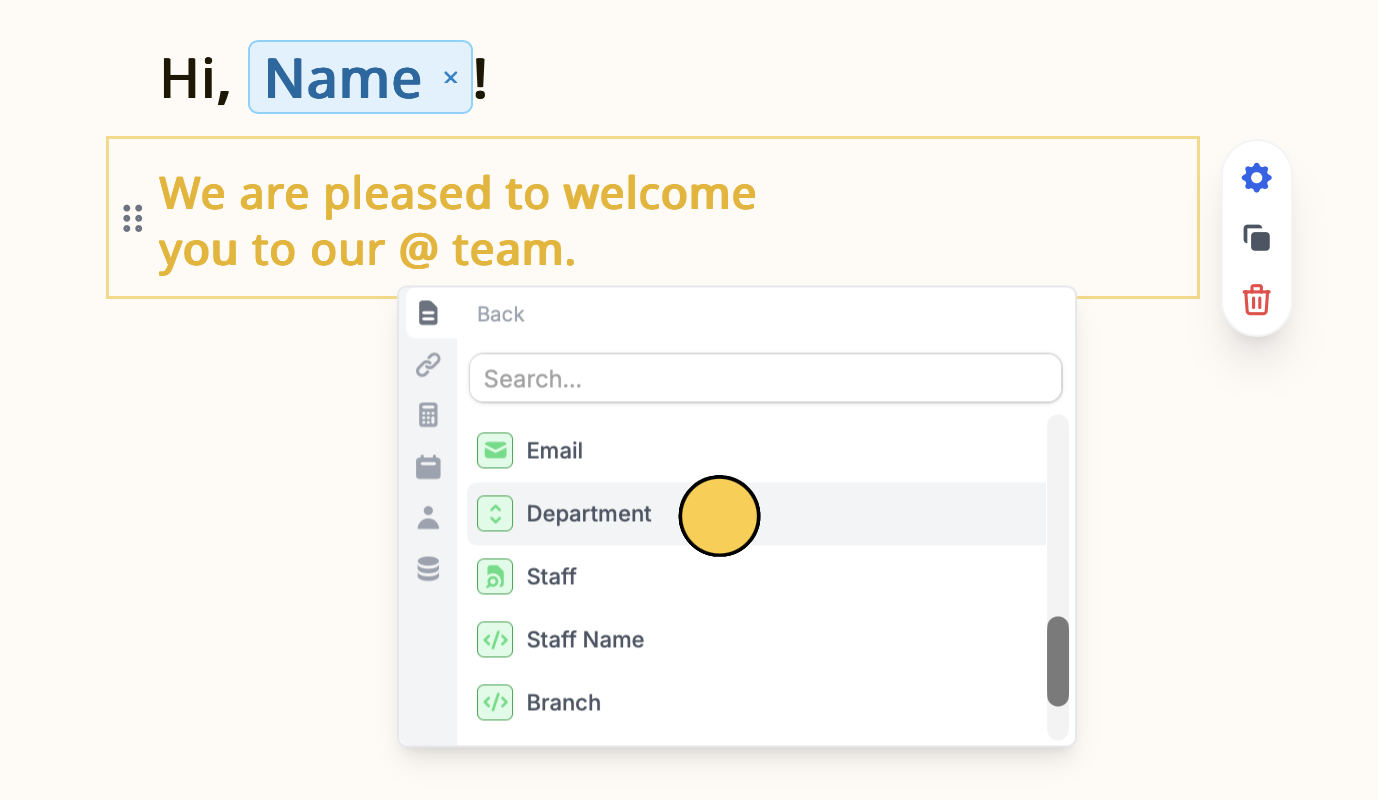
Click the **field** you'd like to insert or use. In this example, we'll choose "Department".
Then, click **User**.
Click the **field** you'd like to insert or use. In this example, we'll choose "Department".
 Displaying logged-in data helps personalize the form-filling experience. Follow these steps to complete the common use cases below.
## Prefill known information
Avoid asking respondents to re-enter data you already have. For example, auto-fill fields with their name, email, department and location. More info [here](https://www.fillout.com/help/prefill-fields).
## Show or skip pages based on user role
Control what users see based on their role or attributes using [page logic](https://www.fillout.com/help/page-logic). For example, if a logged-in user is a student, skip pages meant only for teachers.
Make sure your form is set to [**update an existing record**](https://www.fillout.com/help/airtable-update-form#how-it-works) in your integration in order to use logged-in data.
## Use logged-in data in workflows and integrations
Pass user data directly into automations. For example, [send notifications that include the user’s name](https://www.fillout.com/help/custom-emails#how-to-send-a-custom-email) or role. You can also map logged-in user data directly into Airtable, Notion, etc.
## Restrict record picker choices
Limit what respondents can see and select in the [record picker dropdown](https://www.fillout.com/help/record-pickers#how-it-works) based on their own data by adding **filters**. This helps avoid long lists and reduces the chance of selecting the wrong option.
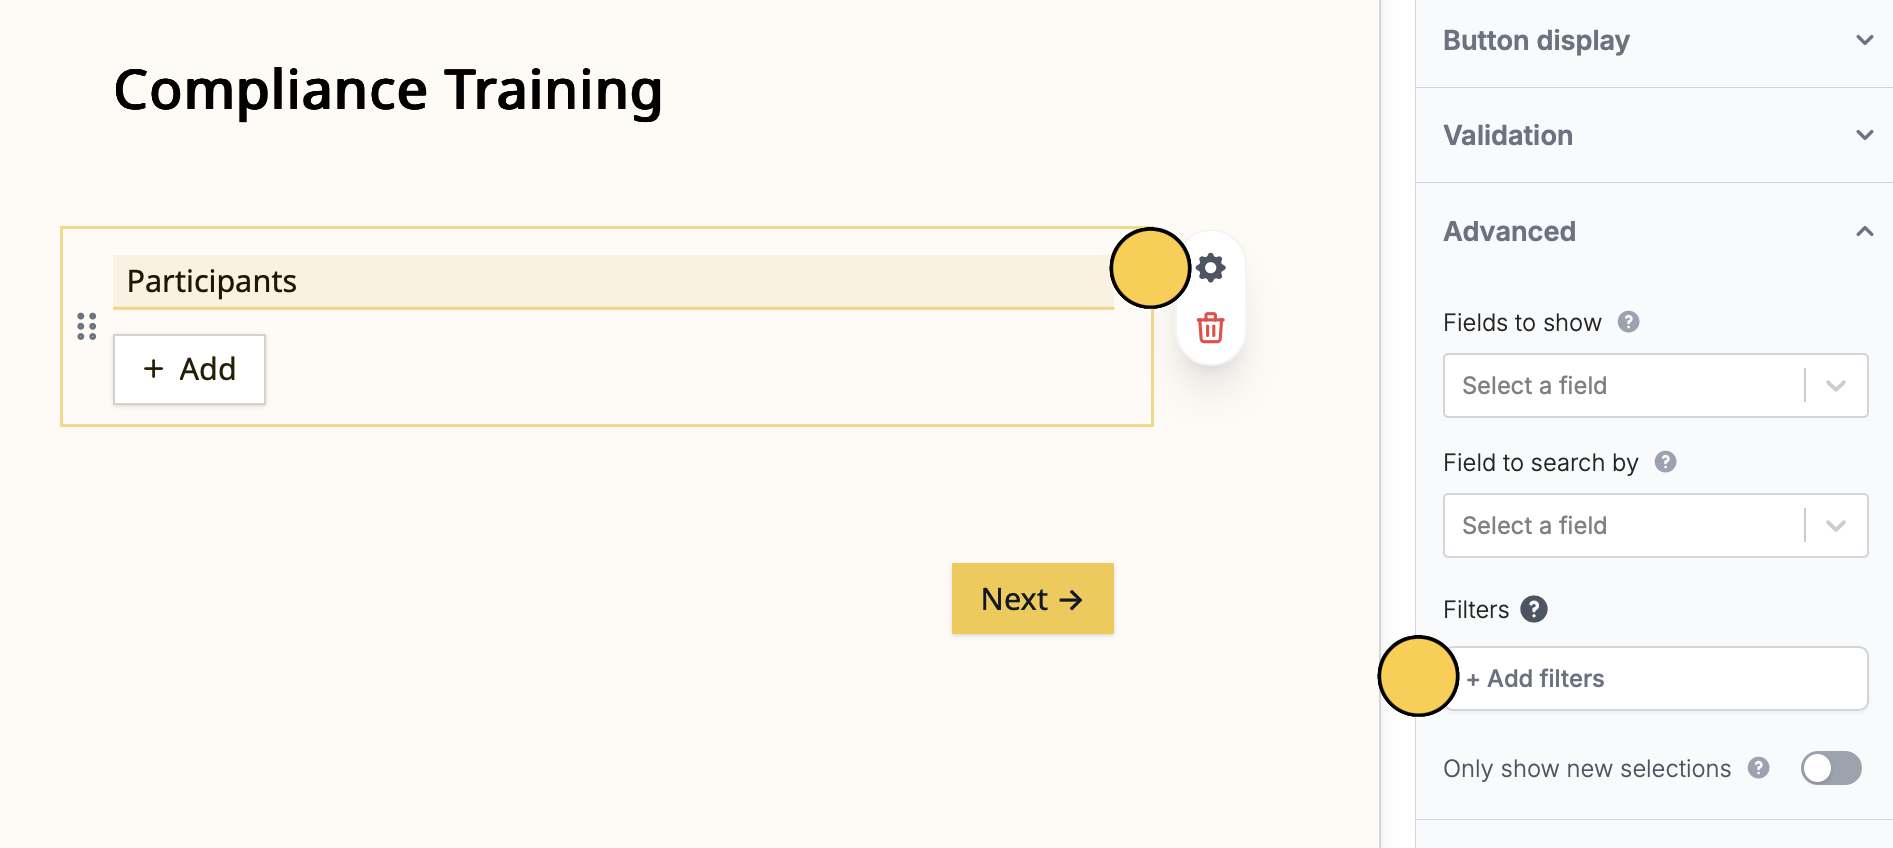
Click your **record picker** followed by its `gear icon` .
In the right-hand panel, scroll down to **Advanced** and `+ Add filters`.
Displaying logged-in data helps personalize the form-filling experience. Follow these steps to complete the common use cases below.
## Prefill known information
Avoid asking respondents to re-enter data you already have. For example, auto-fill fields with their name, email, department and location. More info [here](https://www.fillout.com/help/prefill-fields).
## Show or skip pages based on user role
Control what users see based on their role or attributes using [page logic](https://www.fillout.com/help/page-logic). For example, if a logged-in user is a student, skip pages meant only for teachers.
Make sure your form is set to [**update an existing record**](https://www.fillout.com/help/airtable-update-form#how-it-works) in your integration in order to use logged-in data.
## Use logged-in data in workflows and integrations
Pass user data directly into automations. For example, [send notifications that include the user’s name](https://www.fillout.com/help/custom-emails#how-to-send-a-custom-email) or role. You can also map logged-in user data directly into Airtable, Notion, etc.
## Restrict record picker choices
Limit what respondents can see and select in the [record picker dropdown](https://www.fillout.com/help/record-pickers#how-it-works) based on their own data by adding **filters**. This helps avoid long lists and reduces the chance of selecting the wrong option.
Click your **record picker** followed by its `gear icon` .
In the right-hand panel, scroll down to **Advanced** and `+ Add filters`.
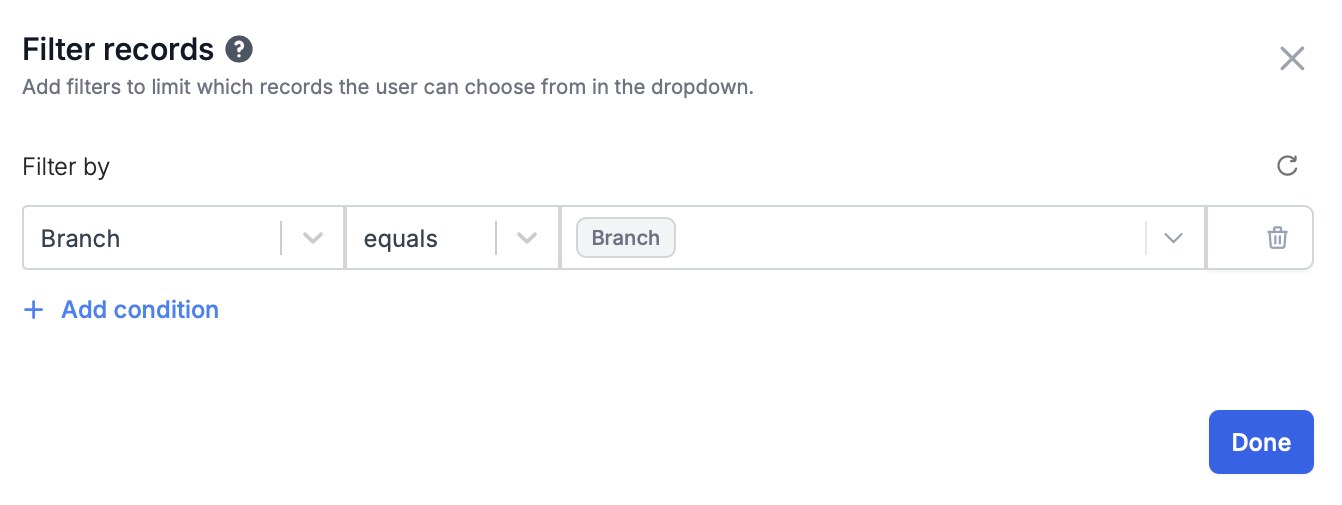
 Click `+ Add condition`. For example, we'll let store managers view and select employees only from their branch.
* **Left dropdown:** Database field to filter by (e.g. location, department, or restock level)
* **Center dropdown:** Condition operators (like equals, does not equal, contains, less than, etc.)
* **Right dropdown:** Value to match against (Click User first followed by the field associated with them)
Click `+ Add condition`. For example, we'll let store managers view and select employees only from their branch.
* **Left dropdown:** Database field to filter by (e.g. location, department, or restock level)
* **Center dropdown:** Condition operators (like equals, does not equal, contains, less than, etc.)
* **Right dropdown:** Value to match against (Click User first followed by the field associated with them)
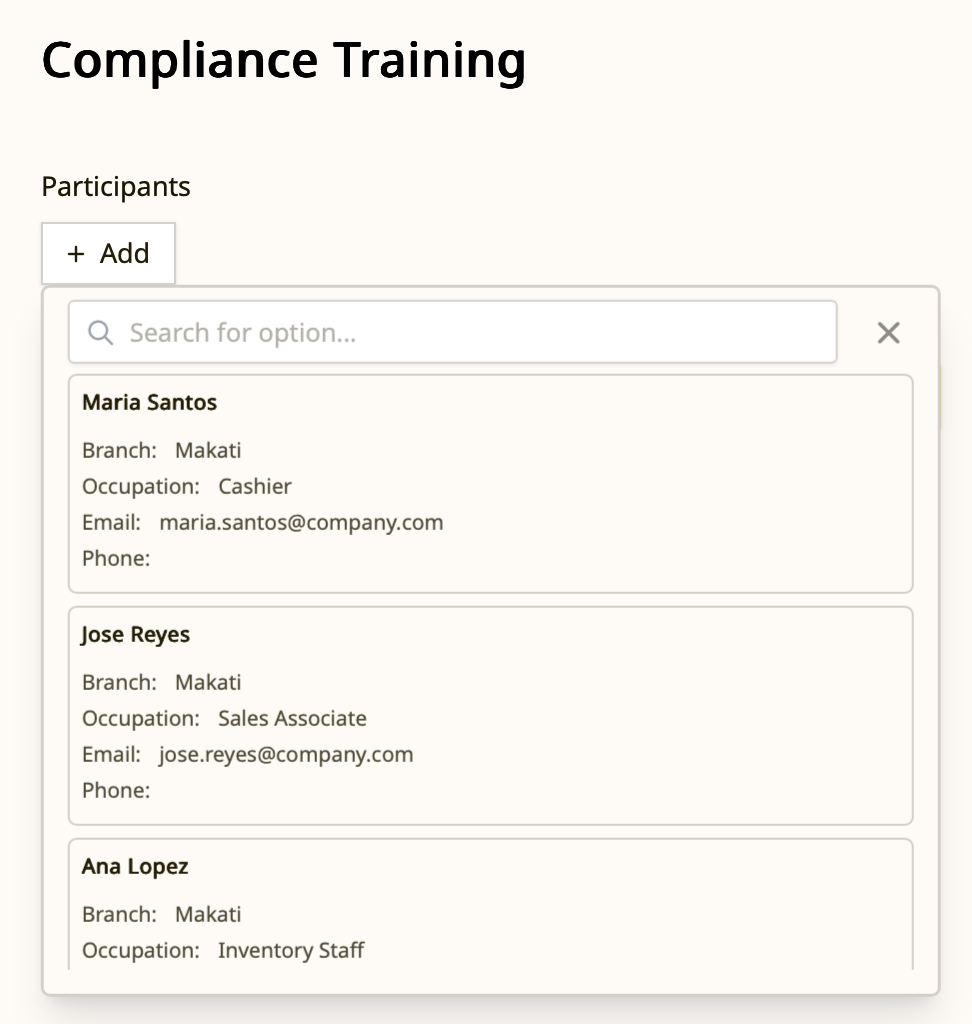 You can add **multiple filters** to refine your results. For example, match Location (left dropdown) to User Location (right) AND Availability to "In Stock".
Filters currently only support **AND logic**. **OR condition** and **does not contain** can't be applied.
You can add **multiple filters** to refine your results. For example, match Location (left dropdown) to User Location (right) AND Availability to "In Stock".
Filters currently only support **AND logic**. **OR condition** and **does not contain** can't be applied.