> ## Documentation Index
> Fetch the complete documentation index at: https://fillout.com/help/llms.txt
> Use this file to discover all available pages before exploring further.

# Group meeting

> Arrange a call with one host and multiple invitees through Fillout Scheduling for free. Edit the host’s availability and add buffer times.

export const SupportBanner = () => {
  const titleId = React.useId();
  return <div className="support-banner" role="region" aria-labelledby={titleId}>
      <span className="support-banner__ring support-banner__ring--outer" aria-hidden="true" />
      <span className="support-banner__ring support-banner__ring--middle" aria-hidden="true" />
      <span className="support-banner__ring support-banner__ring--inner" aria-hidden="true" />
      <span className="support-banner__ring support-banner__ring--center" aria-hidden="true" />

      <div className="support-banner__content">
        <div className="support-banner__title" id={titleId} role="heading" aria-level="2">Still have questions?</div>

        <div className="support-banner__copy">
          <span className="support-banner__line">Our team is happy to help. Start a live chat using the</span>
          <span className="support-banner__line">
            chat bubble <span className="support-banner__chat-icon" aria-hidden="true" /> in the bottom right, or email us at
          </span>
          <span className="support-banner__line">
            <a href="mailto:support@fillout.com">support{'@'}fillout.com</a>
          </span>
        </div>

        <a className="support-banner__cta" href="mailto:support@fillout.com">Contact us</a>
      </div>
    </div>;
};

## What is a group meeting

Group scheduling allows multiple participants to join the same call hosted by a single person. This is ideal for webinars, courses, and other group events.

## How to set up

<Steps>
  <Step title="Create the scheduling form">
    From your dashboard `Create` a `Group meeting` form. Follow the quick steps [here](/help/fillout-scheduling-intro).
  </Step>

  <Step title="Configure event details">
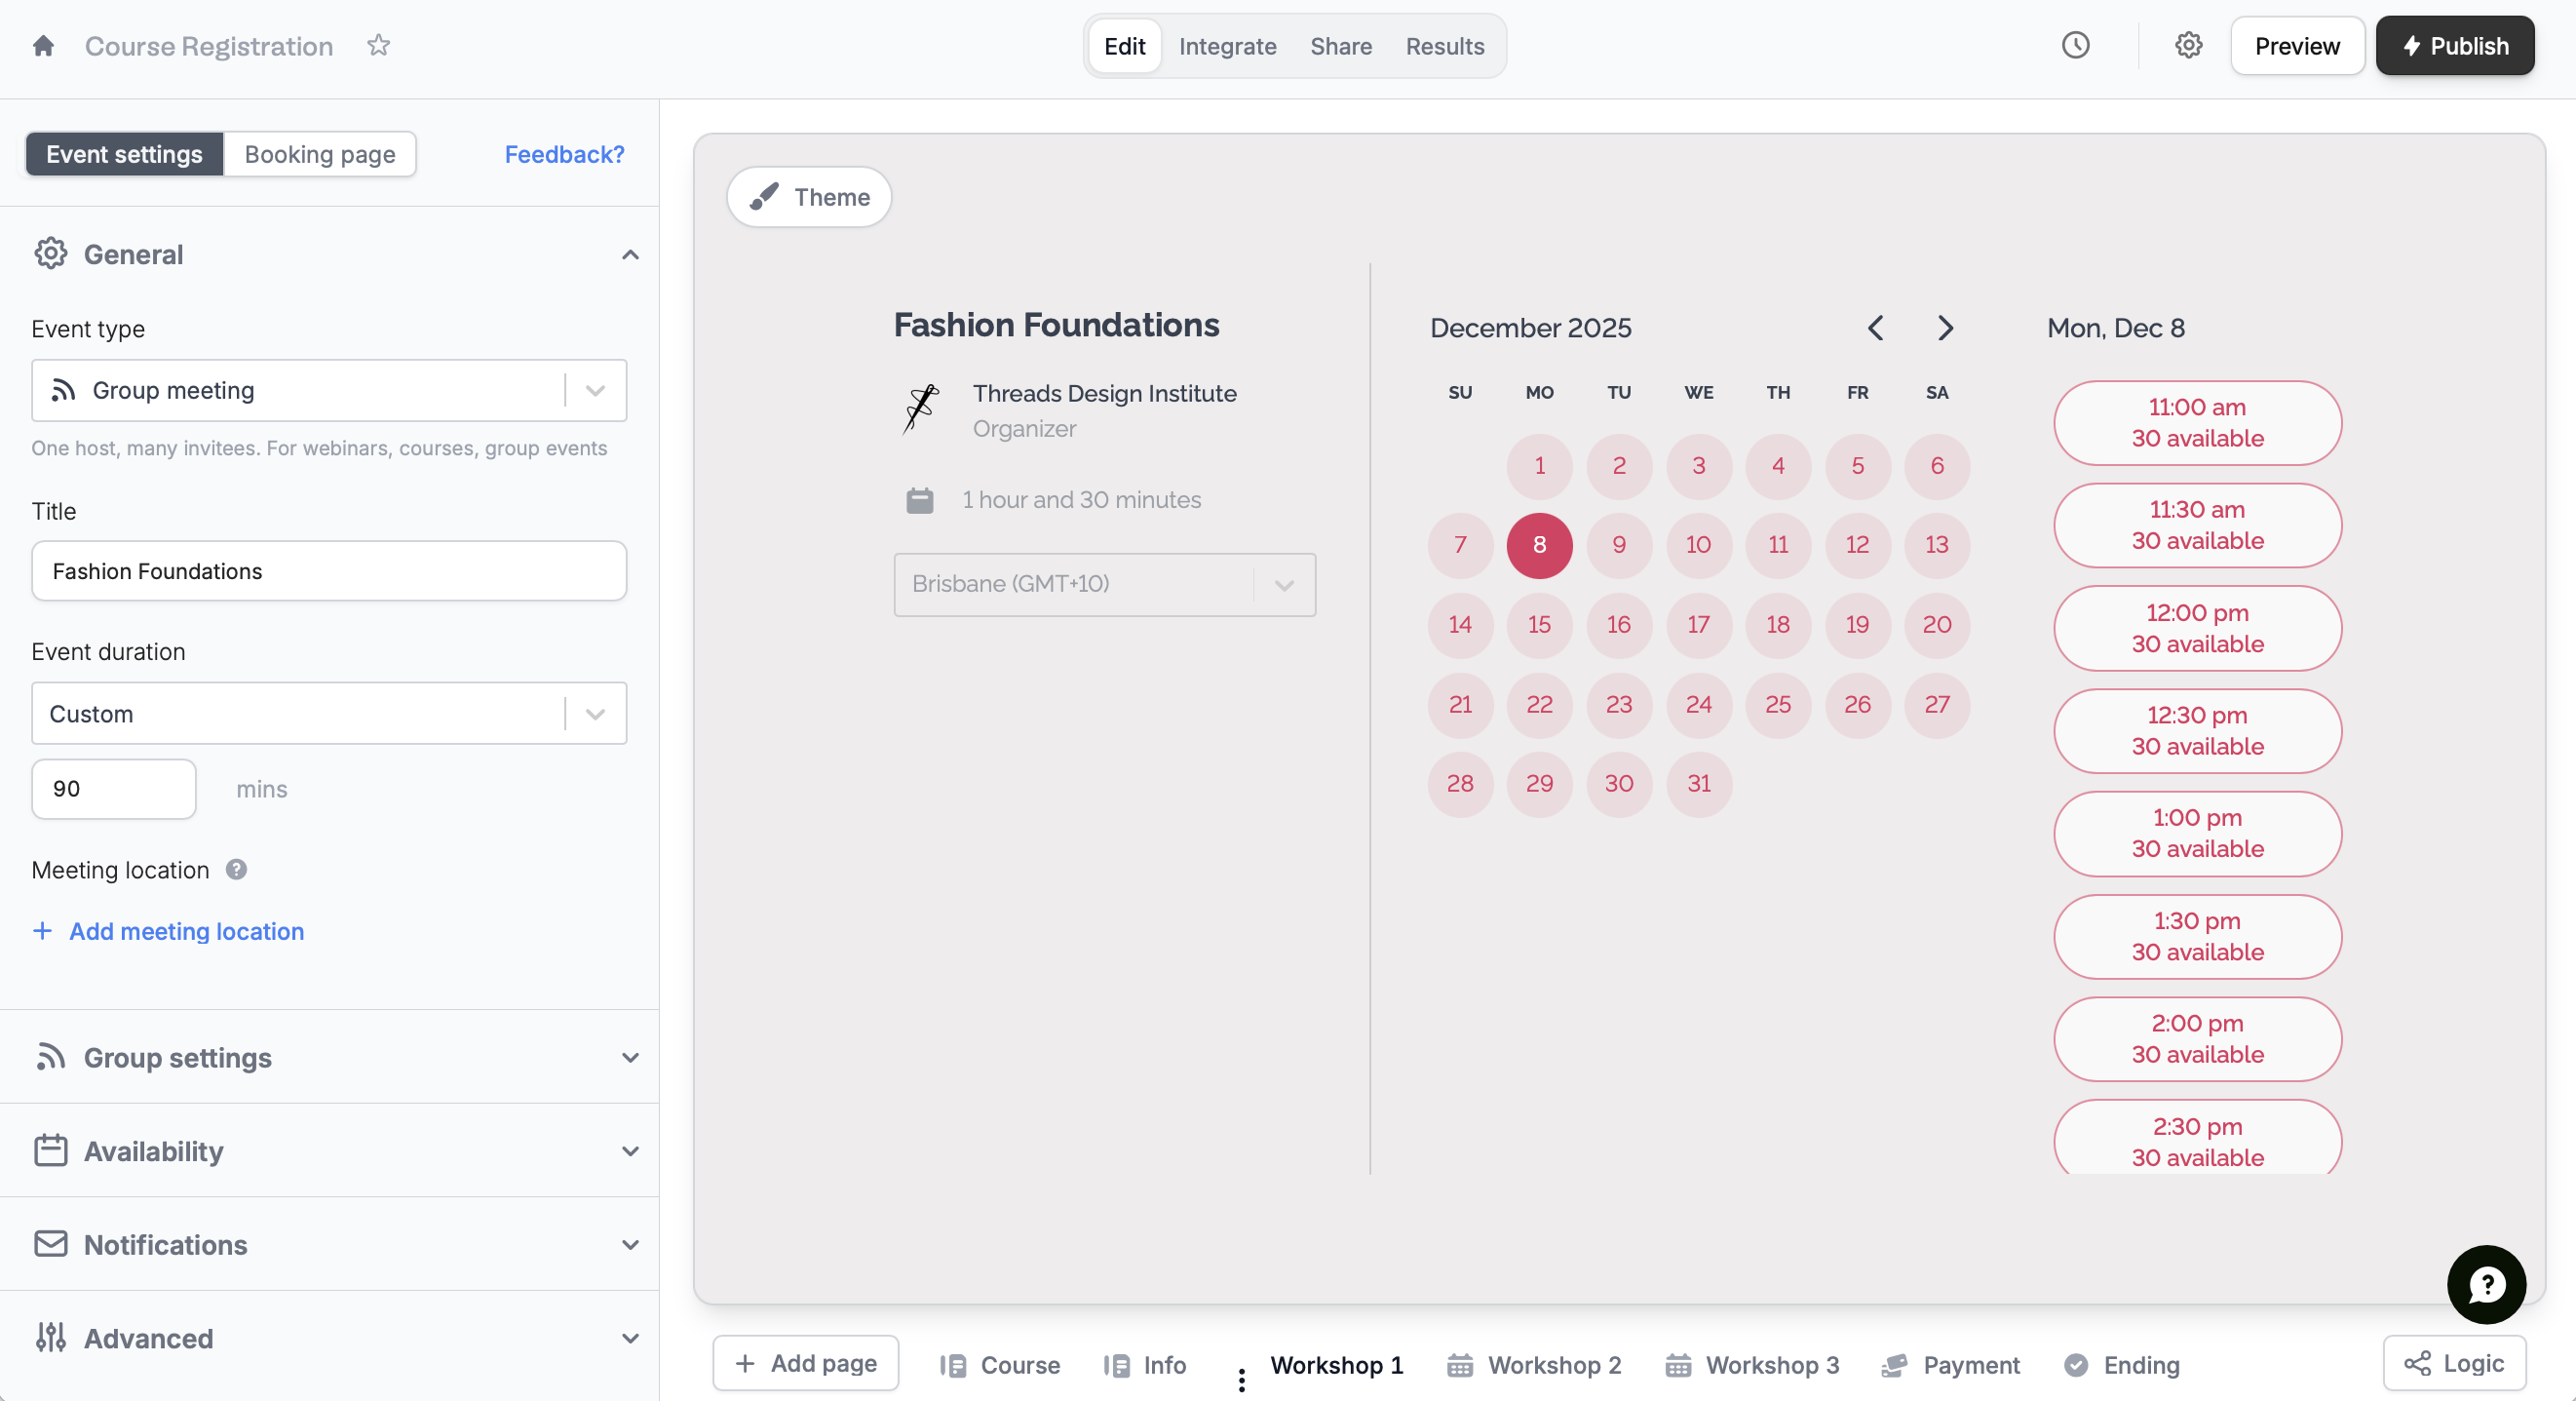
    On the left-hand panel, edit the details as you see fit. You can also [customize avatars](https://www.fillout.com/help/customize-fillout-scheduling#change-your-avatar) to maintain brand consistency by clicking `Booking page` on top.
    <img src="https://mintcdn.com/fillout-005a867b/2VKqQChav3PV_UgL/images/Screenshot2025-10-21at3.16.52PM.png?fit=max&auto=format&n=2VKqQChav3PV_UgL&q=85&s=43ea14fb488b99486490a970699b1ed4" alt="Screenshot 2025-10-21 at 3.16.52 PM.png" width="2643" height="1437" data-path="images/Screenshot2025-10-21at3.16.52PM.png" />
  </Step>

  <Step title="Publish and share">
    That's it! `Publish` your form and share the link or embed it anywhere.
  </Step>
</Steps>

## Set the maximum attendee limit

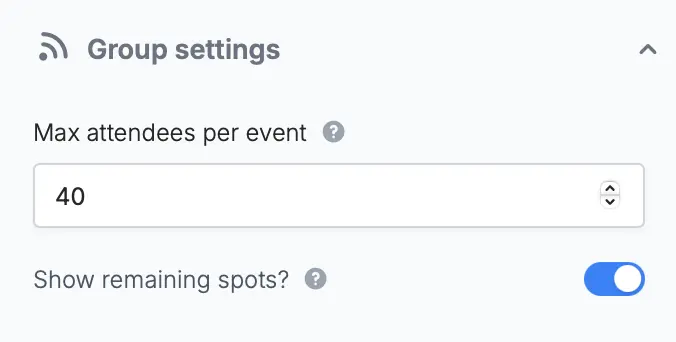
On the left-hand panel, input a number for **Max attendees per event**.
<img src="https://mintcdn.com/fillout-005a867b/FqvyS0NEDuPdNc27/images/scheduling/image-43.png?fit=max&auto=format&n=FqvyS0NEDuPdNc27&q=85&s=f991c653f8240e28cacaee305f9c3ce2" alt="" style={{ width:"52%" }} width="676" height="342" data-path="images/scheduling/image-43.png" />

## Related articles

<CardGroup cols={3}>
  <Card title="Event types" icon="calendar-users" iconType="regular" color="#FFC738" href="/help/event-types">
    Select the event type that best fits your agenda.
  </Card>

  <Card title="Email reminders" icon="alarm-clock" iconType="regular" color="#FFC738" href="/help/email-reminder">
    Automate reminders to your meeting guests via email.
  </Card>

  <Card title="Set your availability" icon="calendar-clock" iconType="regular" color="#FFC738" href="/help/fillout-scheduling-availability">
    Specify your available hours and buffer times through forms.
  </Card>
</CardGroup>

<SupportBanner />
