> ## Documentation Index
> Fetch the complete documentation index at: https://fillout.com/help/llms.txt
> Use this file to discover all available pages before exploring further.
# Granular permissions
> Set member access to view only and restrict integration accounts—available on the Team and Enterprise plans.
export const SupportBanner = () => {
const titleId = React.useId();
return ;
};
## Manage team members with granular permissions
You can limit the access given to any user in your Fillout organization. First, [invite](/help/invite-collaborators) them as a member.
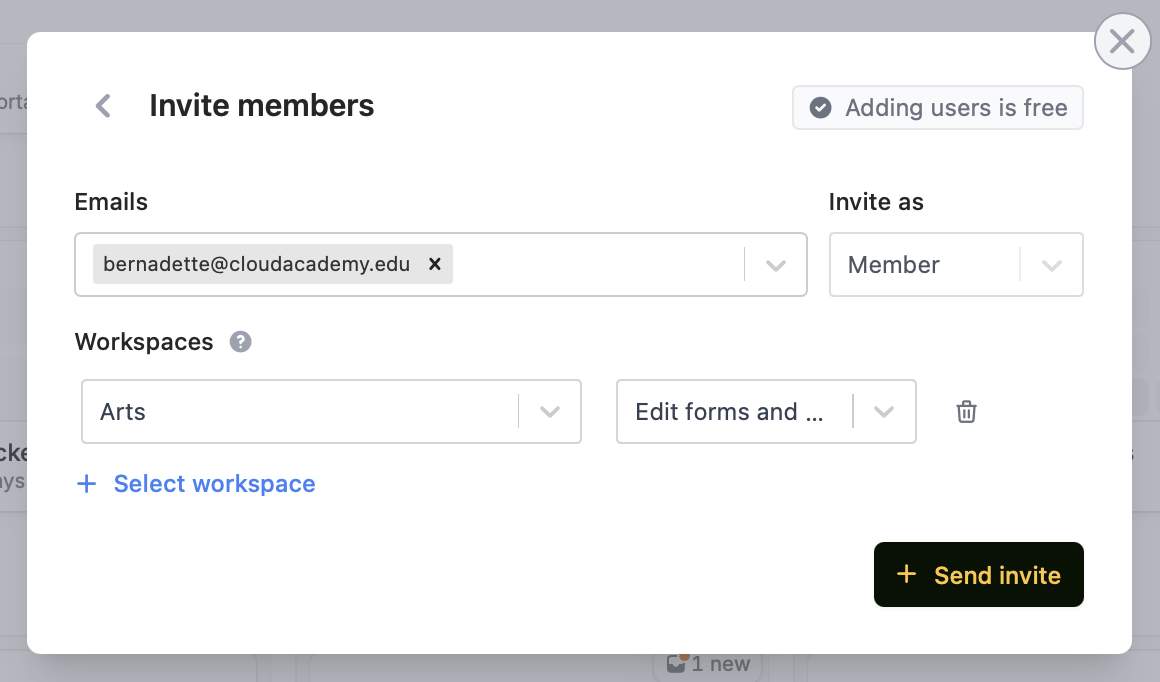 Then, `+ Select workspace` along with their respective access level:
* Edit forms and view results
* View results only
Granular permissions are available on the **Team** and **Enterprise** plans. Learn more about the [Team plan](/help/team-plan).
## View existing permissions
Click your `Account name` in the top left corner followed by `Manage members`.
**Admin vs non-admins**
**Admins** can access all workspaces, integrations, and organization settings. **Non-admins** have limited access based on their assigned workspaces and can't change organization settings. The **account owner** is the first user created on the account and has admin privileges by default.
## Limit access to integrations (connected accounts)
To limit which team members can access which integrations, log in as an admin. From your dashboard, click your `Account name` and head to `Integrations`. More info [here](/help/manage-integrations#limit-workspace-connections).
Users in the allowed workspaces can create new forms and edit existing ones that use that integration. Users without access won’t be able to use the integration.
## Related articles
View results and edit forms with free seats.
Create organizations for different companies with the same email.
Organize forms in folders and control user access.
Then, `+ Select workspace` along with their respective access level:
* Edit forms and view results
* View results only
Granular permissions are available on the **Team** and **Enterprise** plans. Learn more about the [Team plan](/help/team-plan).
## View existing permissions
Click your `Account name` in the top left corner followed by `Manage members`.
**Admin vs non-admins**
**Admins** can access all workspaces, integrations, and organization settings. **Non-admins** have limited access based on their assigned workspaces and can't change organization settings. The **account owner** is the first user created on the account and has admin privileges by default.
## Limit access to integrations (connected accounts)
To limit which team members can access which integrations, log in as an admin. From your dashboard, click your `Account name` and head to `Integrations`. More info [here](/help/manage-integrations#limit-workspace-connections).
Users in the allowed workspaces can create new forms and edit existing ones that use that integration. Users without access won’t be able to use the integration.
## Related articles
View results and edit forms with free seats.
Create organizations for different companies with the same email.
Organize forms in folders and control user access.