> ## Documentation Index
> Fetch the complete documentation index at: https://fillout.com/help/llms.txt
> Use this file to discover all available pages before exploring further.
# Use dynamic data in a form
> Fetch data from tools like Airtable, Notion or any service with an API. Display dynamic content in your form and use it to hide, validate, and pre-fill fields.
export const SupportBanner = () => {
const titleId = React.useId();
return ;
};
## Get the data you need
To display dynamic data, first pull the data from Airtable, Notion, or another source into your form. There are several options for doing this, depending on your use case:
* [Login page](/help/login-page) - gives you access to the full user record of whoever logs in
* [URL parameters](/help/url-parameters) - to pass any arbitrary information to your form (e.g., from Stacker, [Softr](/help/embed-fillout-softr), or other portals)
* **Record picker** field type - to access any field in the record that is chosen. (You can also [pre-fill record pickers](https://www.fillout.com/help/record-pickers#how-to-pre-fill-a-record-picker).)
* [Pre-fetch records](/help/pre-fetch-data) - to fetch information from Airtable or Notion before your form loads
## Reference the data in your form
In Fillout, you can **display data almost anywhere**: in question labels, alerts, logic for hiding or validating questions, and more. In this example, we'll use a Text field type, which lets us display uneditable, formatted text.
Follow the steps [here](https://www.fillout.com/help/airtable#how-it-works). Once connected, Airtable [fields will automatically show up](https://www.fillout.com/help/additional-integration-mappings#automatic-field-mapping) in the left-hand panel. You can also [manually map](https://www.fillout.com/help/additional-integration-mappings#how-to-map-fields-manually) existing and new fields.
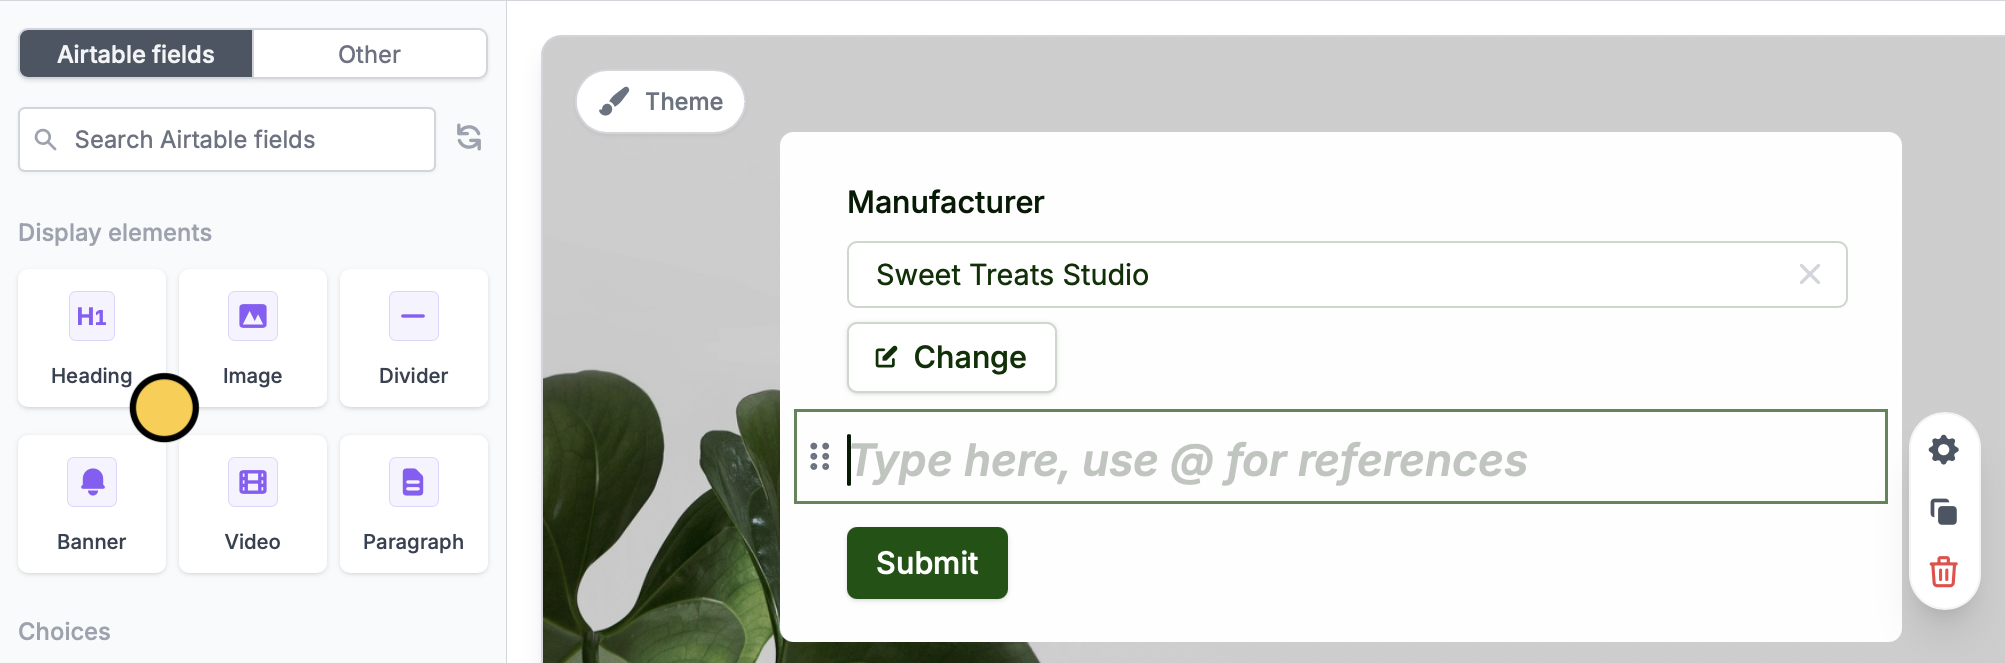
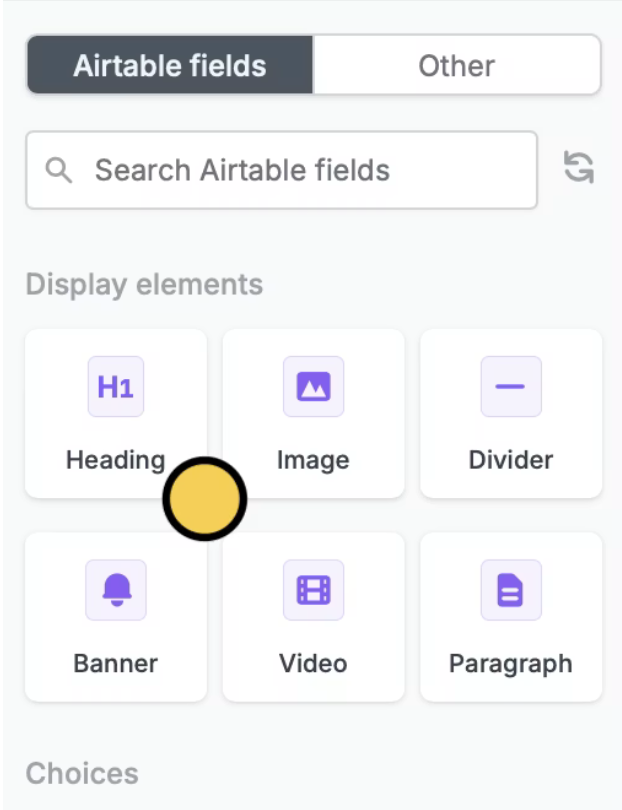 First, drag and drop the Heading field from the left-hand panel to your form. In this example, we have a record picker (Choose a manufacturer) that we want to display more information from.
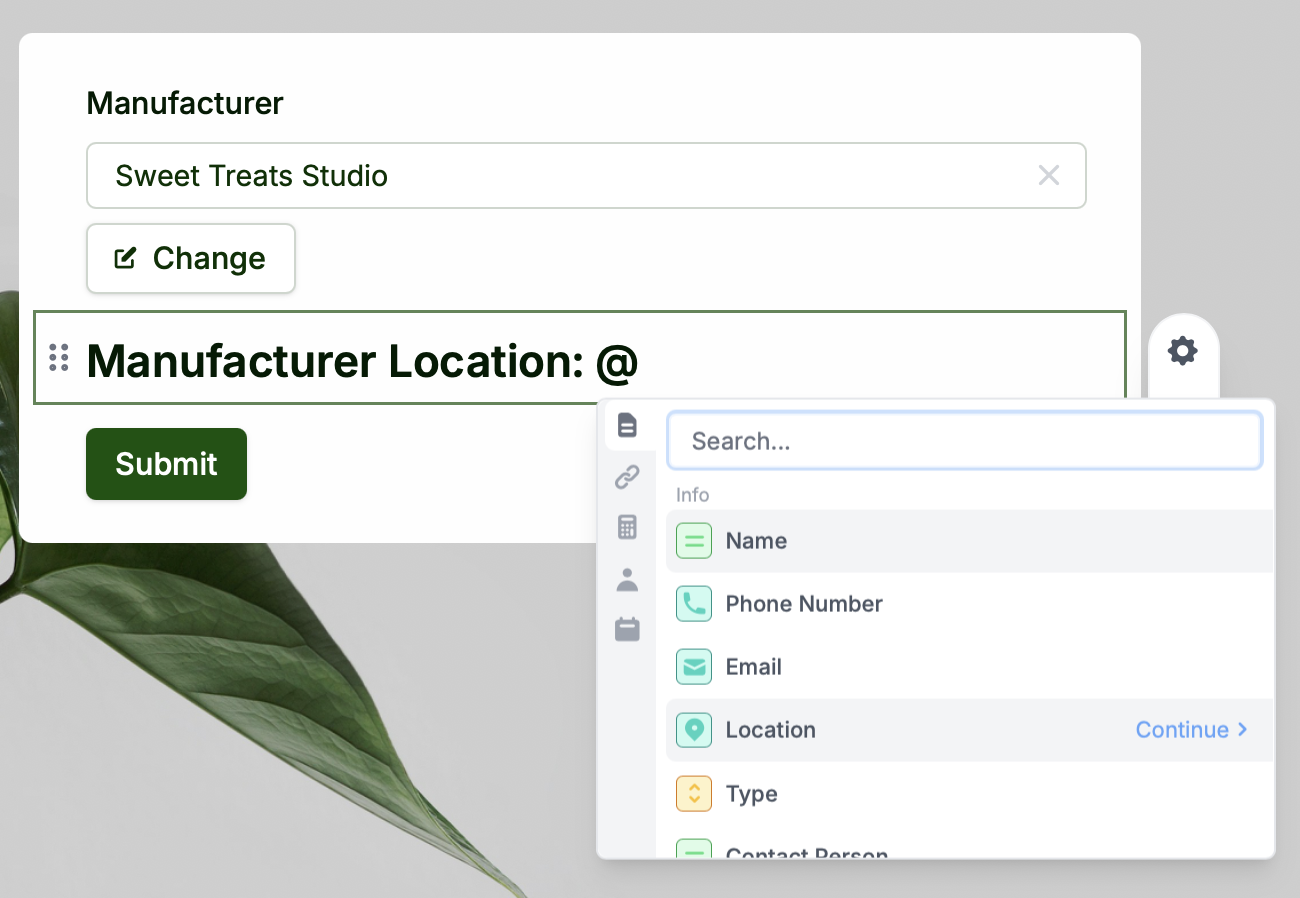
 Type **@** in the heading field to open a menu for picking references to previous form inputs. In the reference picker, click the field you want to display.
 That's it! The blue bubbles in the center indicate the fields we are referencing. This text will now automatically change whenever you pick a new value in the record picker.

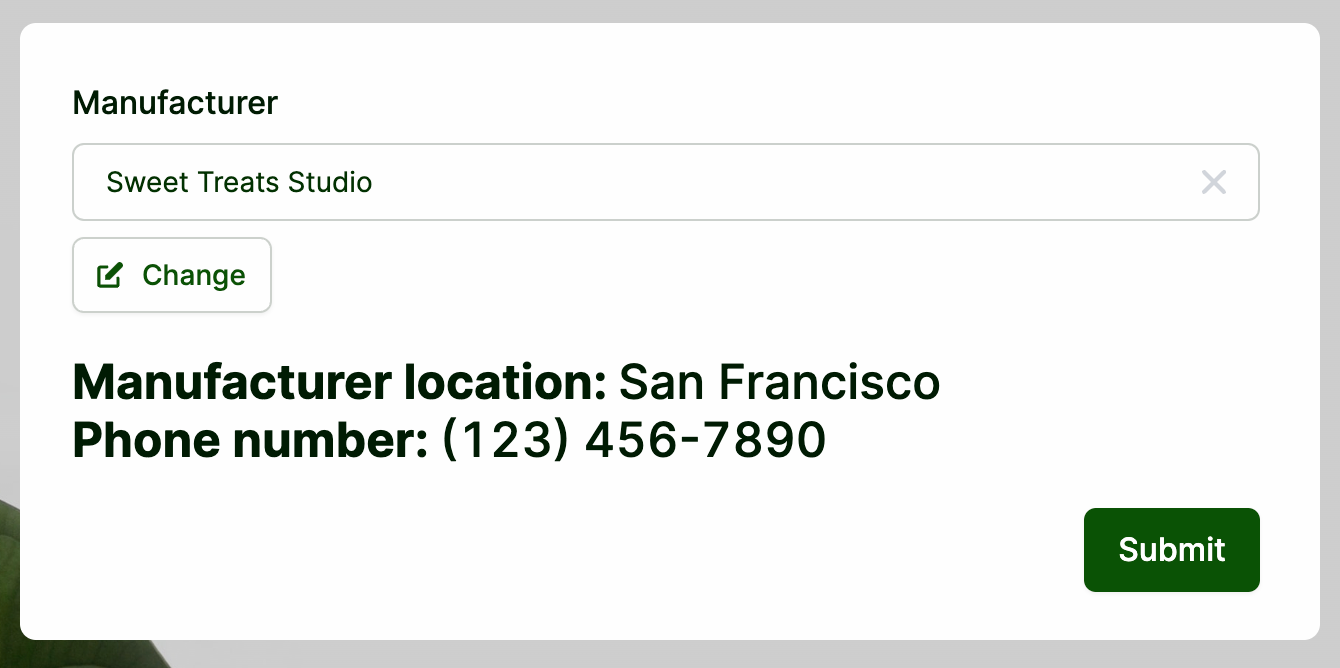 Test your form in `Preview` mode to see it in action. `Publish` it once all is set.
## Other places to reference data
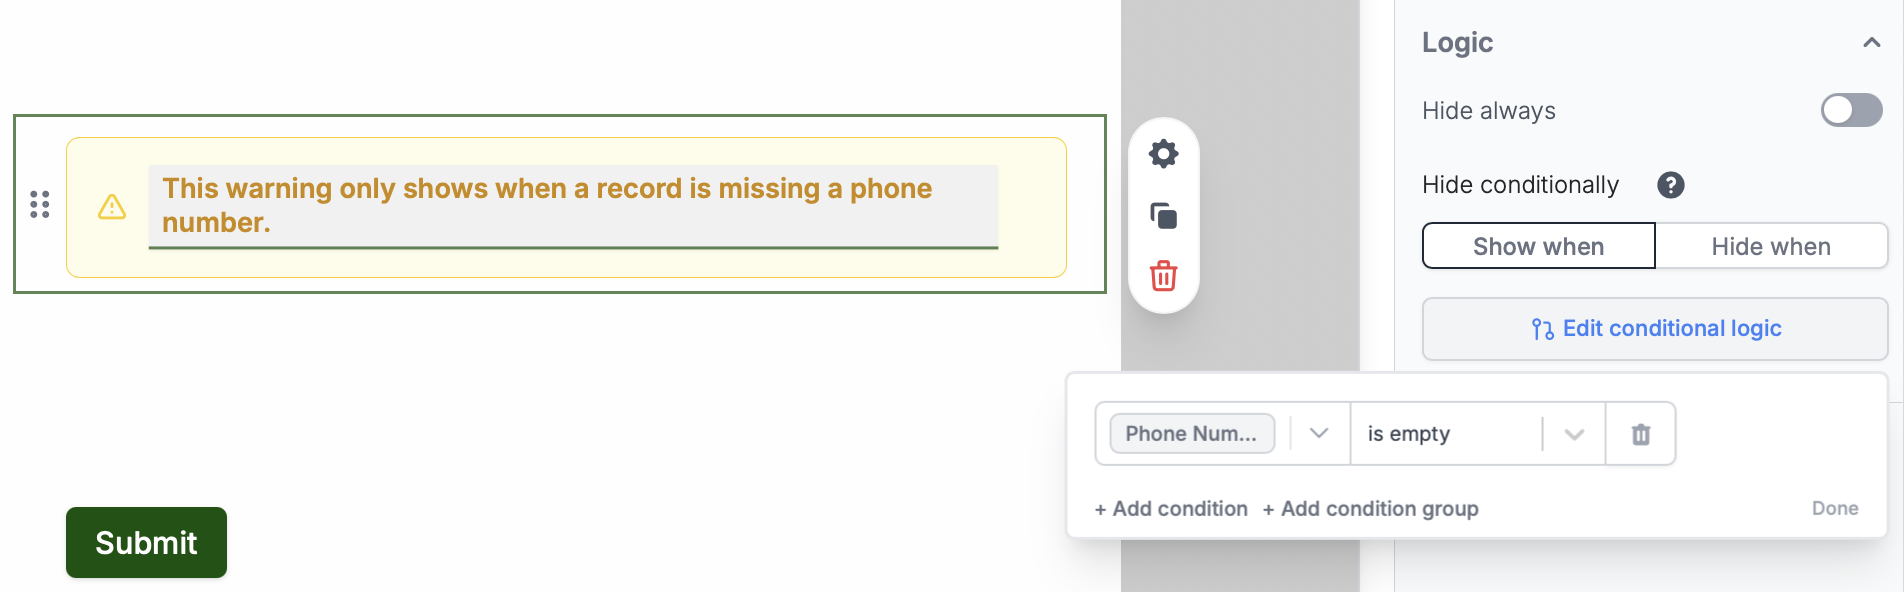
You can also reference the result of the integration step in [show/hide](/help/conditional-hiding) and [validation](/help/input-validation) conditions to customize your form and prevent input errors. Click a field's to open the right-hand panel.
For example, let's show a warning when a field is missing in a record.
Test your form in `Preview` mode to see it in action. `Publish` it once all is set.
## Other places to reference data
You can also reference the result of the integration step in [show/hide](/help/conditional-hiding) and [validation](/help/input-validation) conditions to customize your form and prevent input errors. Click a field's to open the right-hand panel.
For example, let's show a warning when a field is missing in a record.
 Reference data in the **Default value** to pre-fill fields. More info [here](/help/prefill-fields).
## Related articles
Configure form fields and values to send to integrations.
Pass information to a form to support pre-filling.
Fetch info from a tool before your form loads.
Reference data in the **Default value** to pre-fill fields. More info [here](/help/prefill-fields).
## Related articles
Configure form fields and values to send to integrations.
Pass information to a form to support pre-filling.
Fetch info from a tool before your form loads.