> ## Documentation Index
> Fetch the complete documentation index at: https://fillout.com/help/llms.txt
> Use this file to discover all available pages before exploring further.
# Embed Fillout forms on Wix
> Increase conversions and intake data by embedding a powerful Fillout form to a new or existing Wix website.
export const SupportBanner = () => {
const titleId = React.useId();
return ;
};
## What is Wix?
[Wix](http://wix.com/) started as one of the earliest website builders on the market and has grown to serve over 220 million users worldwide. Its premium plans come with a built-in form builder that lacks a few important features like file upload fields and popular third-party integrations.
## Video tutorial
## How to embed your form
Start by clicking `Publish` in the upper right corner of the Fillout form editor. A popup will show up where you can pick an **embed style**.
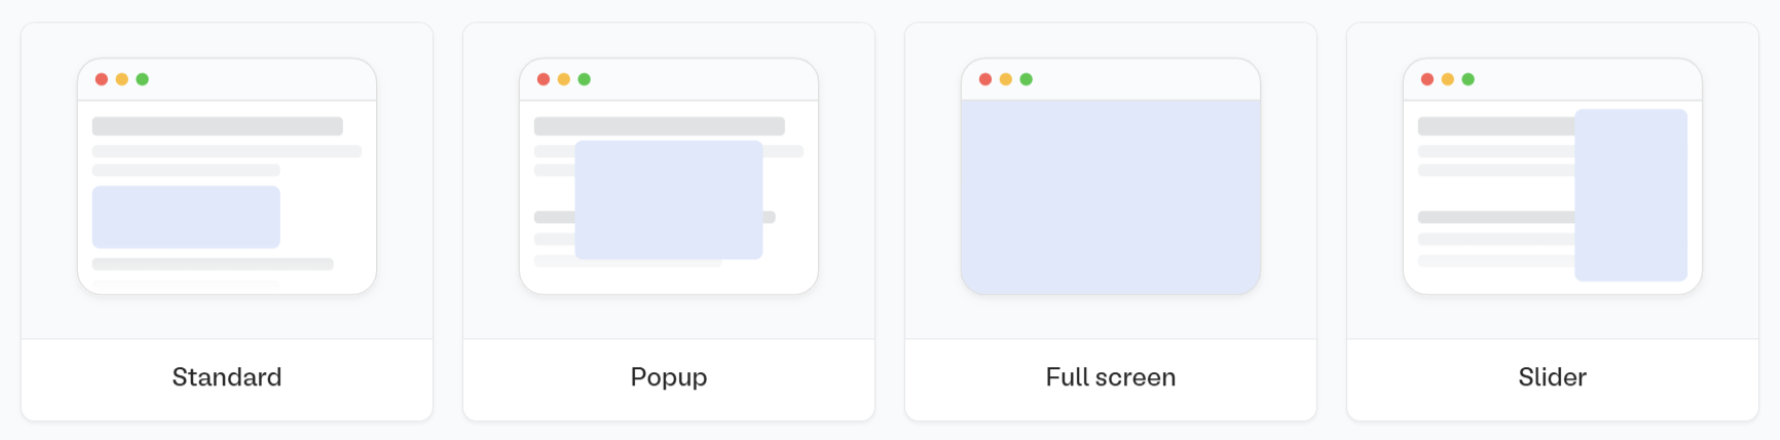 If you've already published your form, click `Share` in the top middle or top right. Adjust your embed style settings to fit your use case. Then, `Get the code`
In Wix’s drag-and-drop editor, embedded elements live inside containers drawn on the page. Click from the left sidebar to open the **Embed code** menu, and click next to **Embed HTML.**
If you've already published your form, click `Share` in the top middle or top right. Adjust your embed style settings to fit your use case. Then, `Get the code`
In Wix’s drag-and-drop editor, embedded elements live inside containers drawn on the page. Click from the left sidebar to open the **Embed code** menu, and click next to **Embed HTML.**
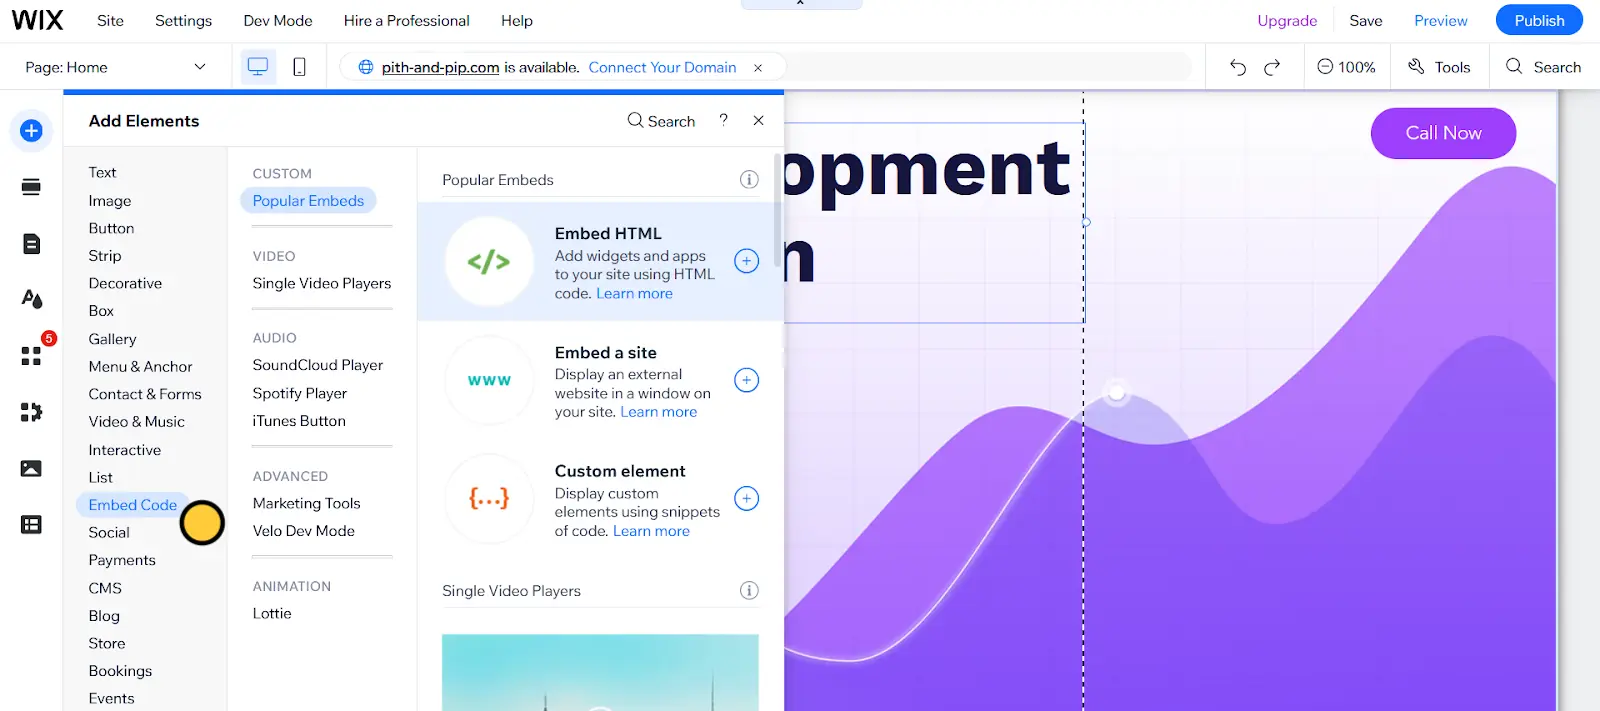 Paste the copied **embed code** from Fillout below **Add your code here (HTTPS only):** and click the `Update` button below the textbox.
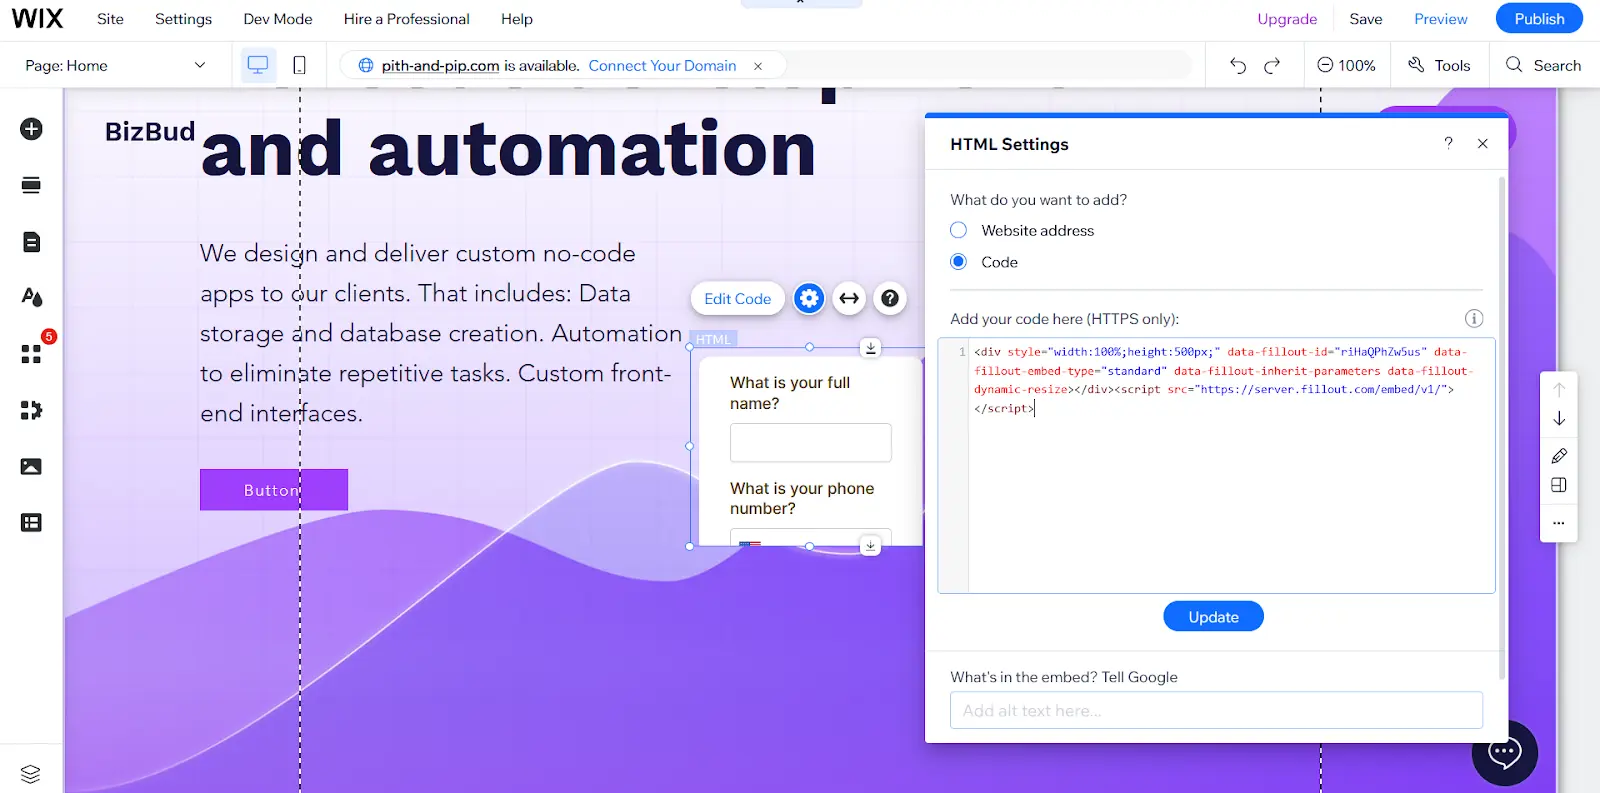 After you see your form inside the Embed HTML container, click and drag the element to wherever you want it on the page. Resize the container by clicking and dragging on any of the white circles lining the border of the element.
## Add a lightbox
To get around embed container limitations, use a lightbox. Although you can add custom code to create popup forms that render outside the bounds of an embed element’s borders, there’s an easier solution.
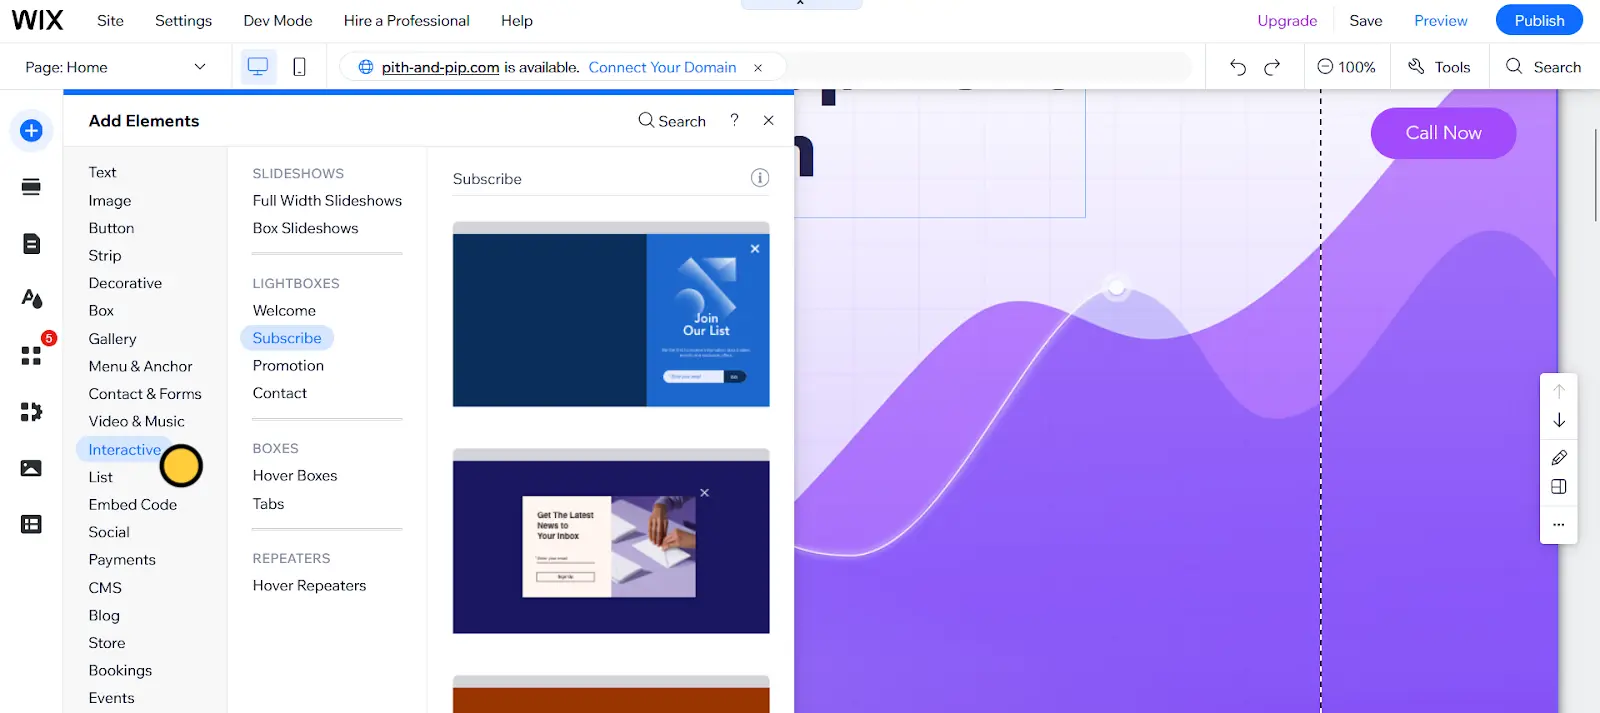
Click from the left sidebar to open the **Interactive** menu, and choose a template from the **Lightboxes** submenu. That will open a new page editor for a popup.
After you see your form inside the Embed HTML container, click and drag the element to wherever you want it on the page. Resize the container by clicking and dragging on any of the white circles lining the border of the element.
## Add a lightbox
To get around embed container limitations, use a lightbox. Although you can add custom code to create popup forms that render outside the bounds of an embed element’s borders, there’s an easier solution.
Click from the left sidebar to open the **Interactive** menu, and choose a template from the **Lightboxes** submenu. That will open a new page editor for a popup.
 Add an **Embed HTML** element inside the lightbox section (using the steps above) and resize the element as needed.
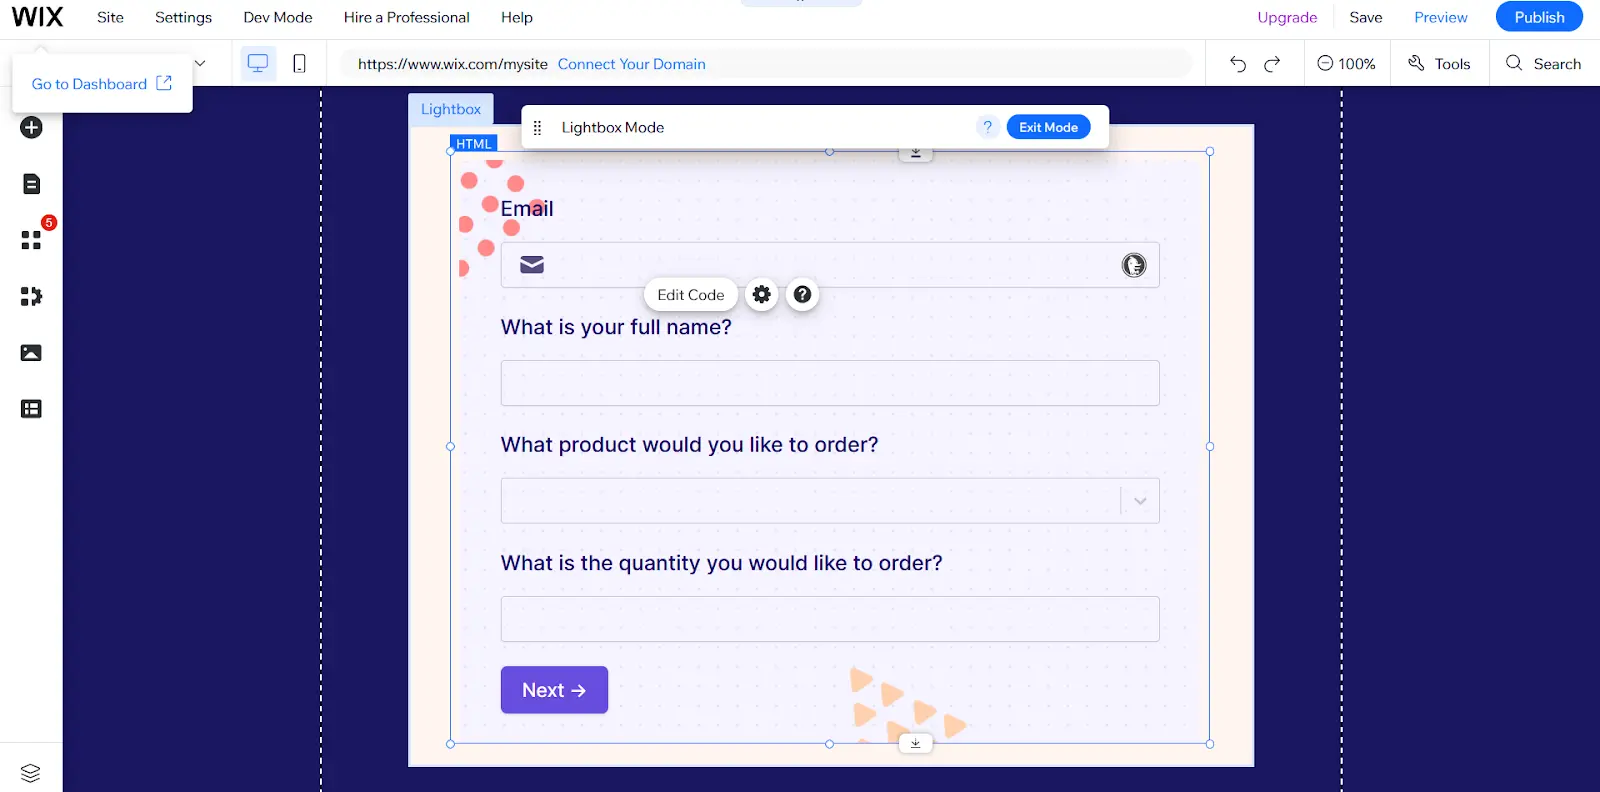 Click `Exit Mode` on top or click the dropdown menu in the upper left corner of the screen to return to editing the previous page.
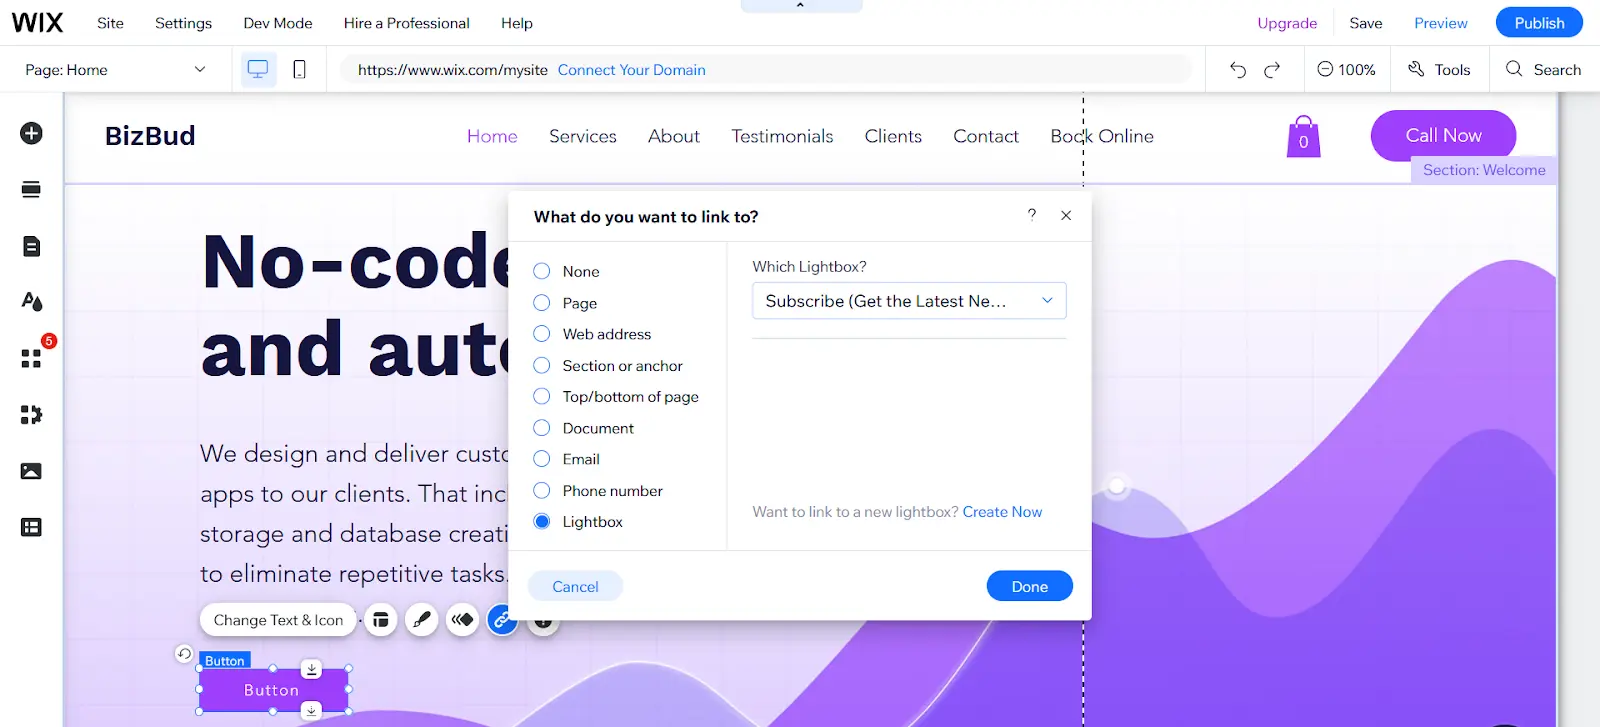
To link a button element or URL text to the lightbox popup, click , choose the **Lightbox** option, and select the lightbox page with your Fillout form from the dropdown list.
Click `Exit Mode` on top or click the dropdown menu in the upper left corner of the screen to return to editing the previous page.
To link a button element or URL text to the lightbox popup, click , choose the **Lightbox** option, and select the lightbox page with your Fillout form from the dropdown list.
 ## Add custom code
If you have a premium Wix account and your site is on a custom domain, you can use Wix’s custom code feature to embed your form anywhere, without the limitations of the iframe embed.
## Add custom code
If you have a premium Wix account and your site is on a custom domain, you can use Wix’s custom code feature to embed your form anywhere, without the limitations of the iframe embed.
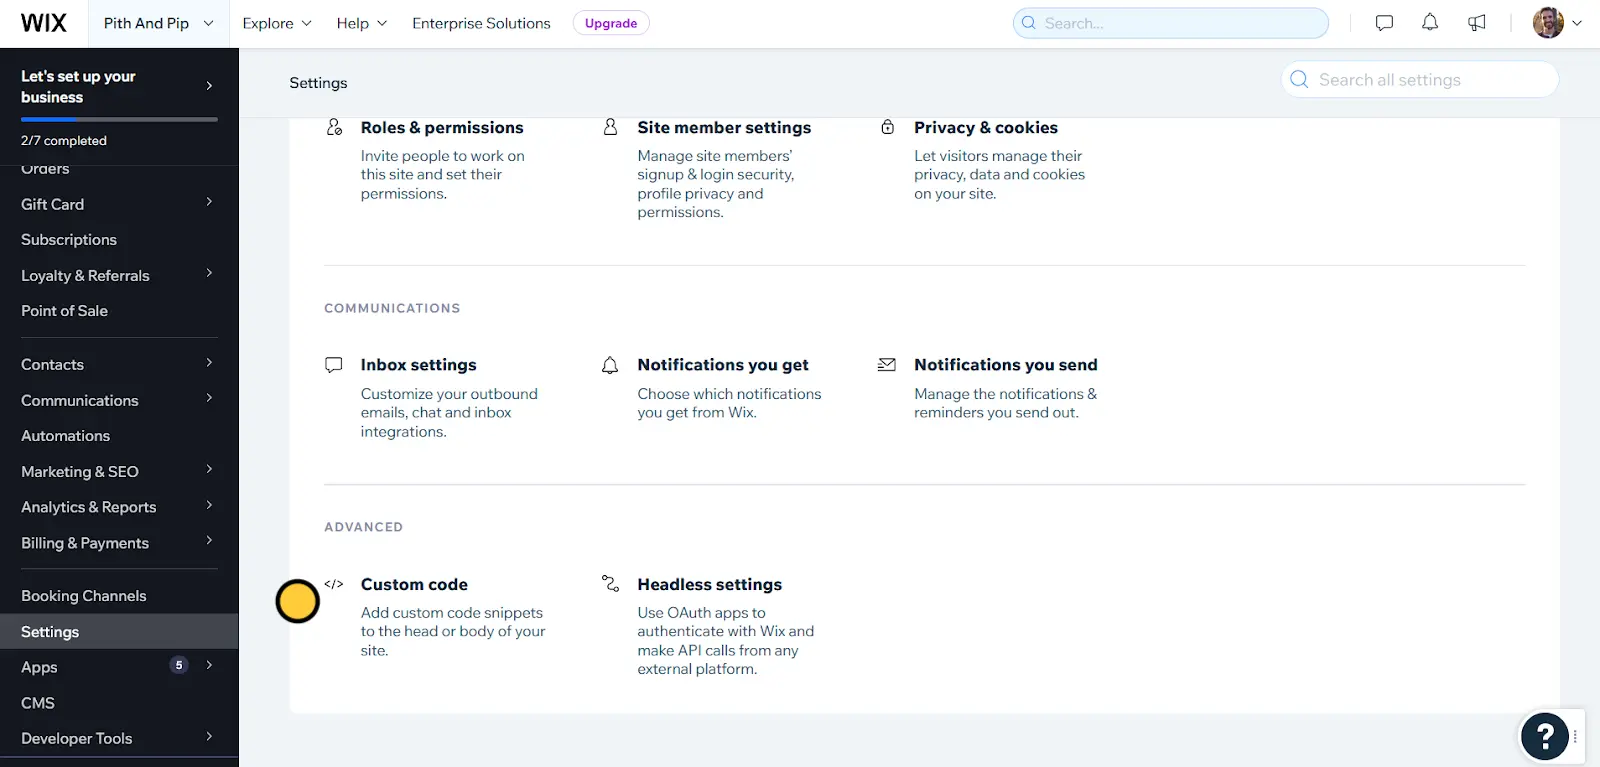 From your Wix account dashboard, open the `Settings` menu from the left sidebar. Scroll to the bottom of the page and click **Custom code**.
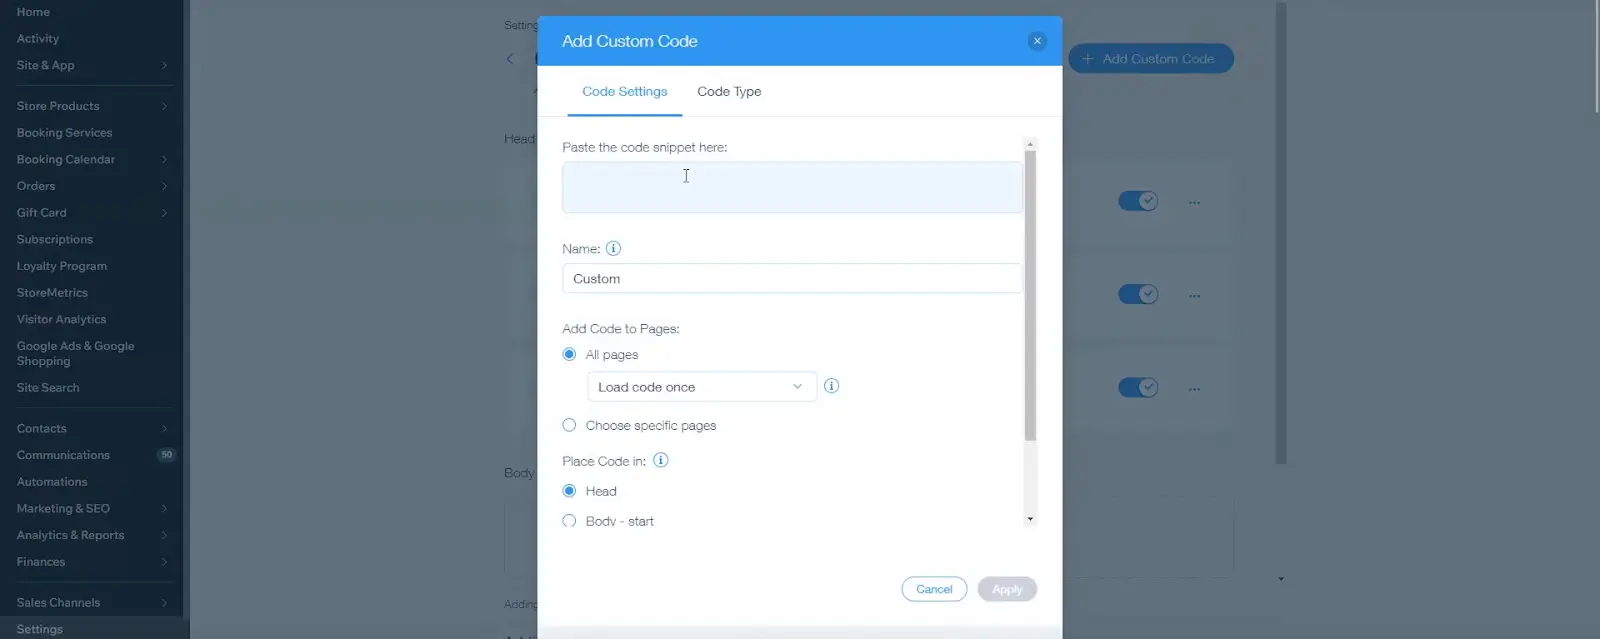 Paste a Fillout **embed code** into the text box. Choose which pages should use the code snippet and select **Body - start** from the **Place Code in:** list. Click `Apply` and preview your site to confirm the changes.
## Related article
Share your form by link or embed it on your website.
Paste a Fillout **embed code** into the text box. Choose which pages should use the code snippet and select **Body - start** from the **Place Code in:** list. Click `Apply` and preview your site to confirm the changes.
## Related article
Share your form by link or embed it on your website.