> ## Documentation Index
> Fetch the complete documentation index at: https://fillout.com/help/llms.txt
> Use this file to discover all available pages before exploring further.

# Delay

> Pause workflows for a specified duration before performing tasks. Choose to delay for minutes, hours, or even days.

export const SupportBanner = () => {
  const titleId = React.useId();
  return <div className="support-banner" role="region" aria-labelledby={titleId}>
      <span className="support-banner__ring support-banner__ring--outer" aria-hidden="true" />
      <span className="support-banner__ring support-banner__ring--middle" aria-hidden="true" />
      <span className="support-banner__ring support-banner__ring--inner" aria-hidden="true" />
      <span className="support-banner__ring support-banner__ring--center" aria-hidden="true" />

      <div className="support-banner__content">
        <div className="support-banner__title" id={titleId} role="heading" aria-level="2">Still have questions?</div>

        <div className="support-banner__copy">
          <span className="support-banner__line">Our team is happy to help. Start a live chat using the</span>
          <span className="support-banner__line">
            chat bubble <span className="support-banner__chat-icon" aria-hidden="true" /> in the bottom right, or email us at
          </span>
          <span className="support-banner__line">
            <a href="mailto:support@fillout.com">support{'@'}fillout.com</a>
          </span>
        </div>

        <a className="support-banner__cta" href="mailto:support@fillout.com">Contact us</a>
      </div>
    </div>;
};

## Overview

Delaying [actions](/help/workflows) gives you control over when tasks are triggered. You can set this delay to last for just a few minutes or extend it to hours or days, depending on your needs. This is especially useful for workflows that require follow-ups, reminders, or timed sequences.

## How to delay an action

<Steps>
  <Step title="Create a workflow">
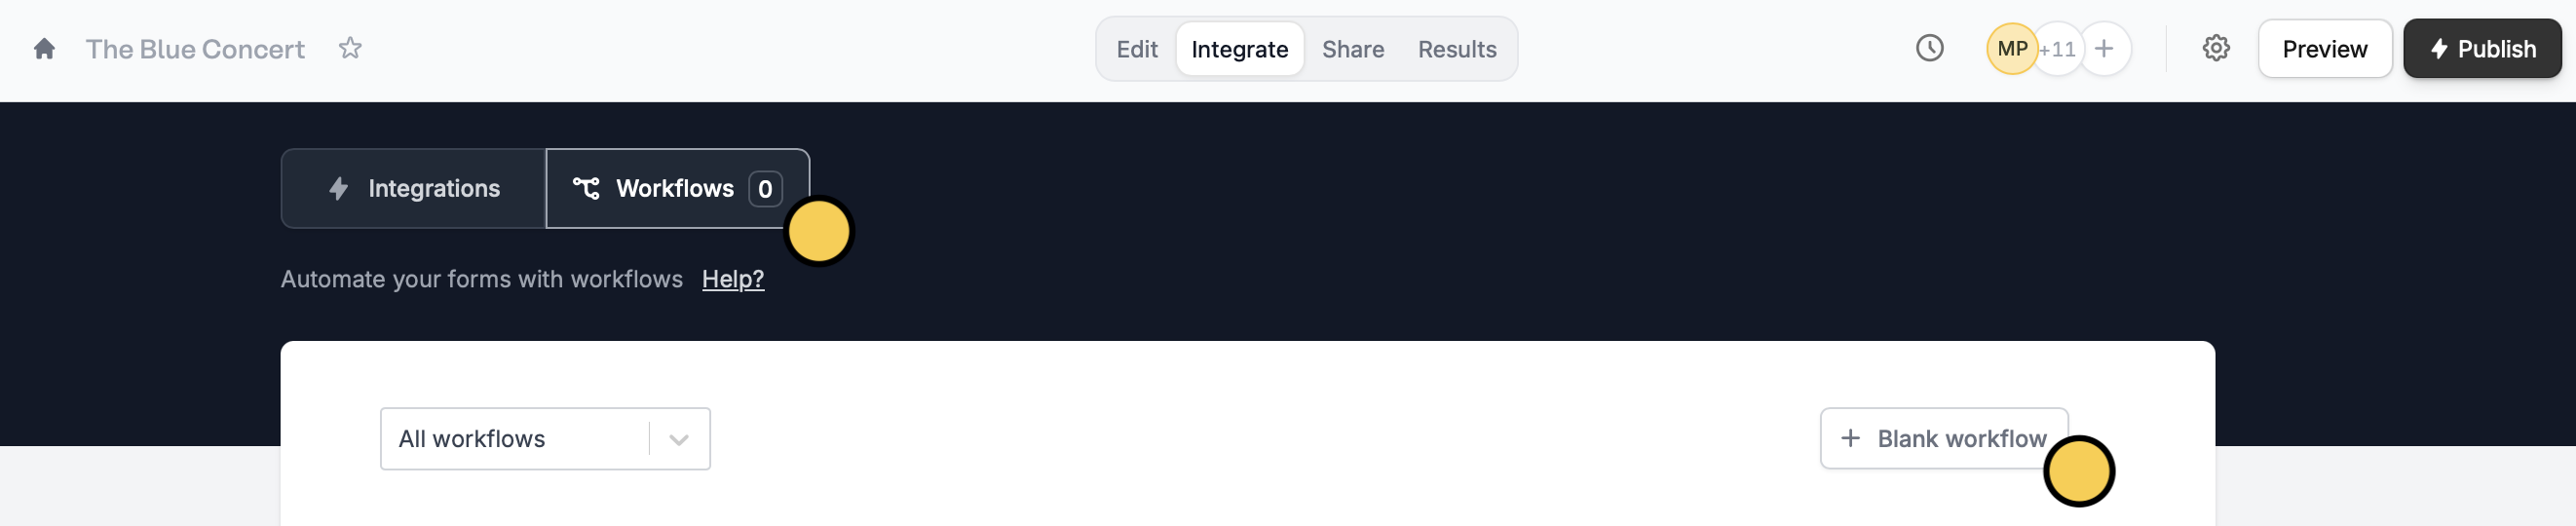
    Click `Integrate` on the top menu of your form, followed by `Workflows`. Then, start with a `+ Blank workflow`.
    <img src="https://mintcdn.com/fillout-005a867b/W3wYSQrxLNbU6vlh/images/Screenshot2025-11-03at5.54.19PM.png?fit=max&auto=format&n=W3wYSQrxLNbU6vlh&q=85&s=f29a94103ea592e6520cdd920ba28a15" alt="Screenshot 2025-11-03 at 5.54.19 PM.png" width="2644" height="540" data-path="images/Screenshot2025-11-03at5.54.19PM.png" />
  </Step>

  <Step title="Choose delay as a first action">
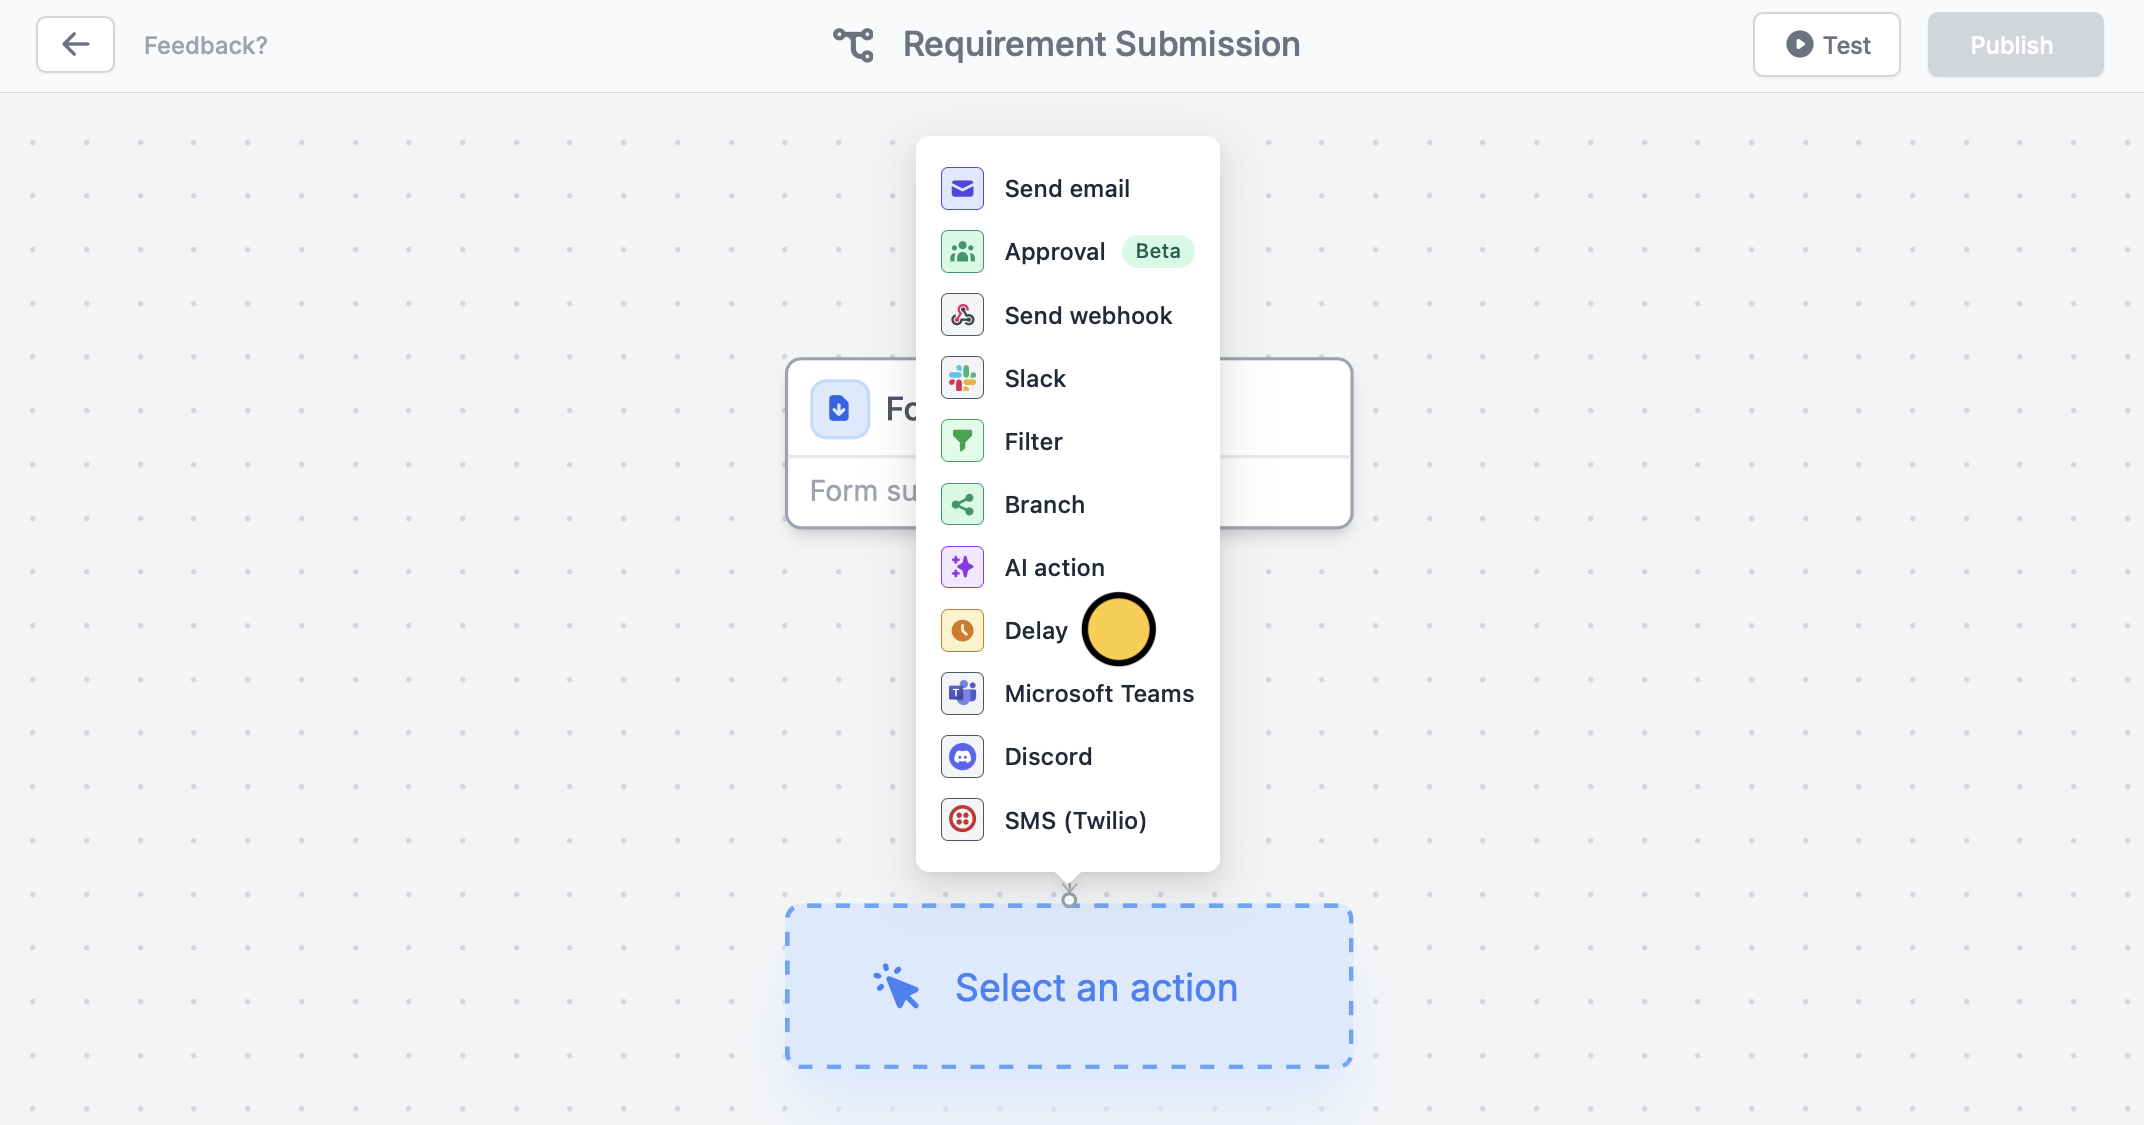
    Select a **trigger**. Then, choose `Delay` and set how soon you want a task to be done. The default delay is 30 minutes, but it can also be set to a shorter duration in minutes or extended to hours or days.
    <img src="https://mintcdn.com/fillout-005a867b/W3wYSQrxLNbU6vlh/images/Screenshot2025-11-03at5.55.47PM.png?fit=max&auto=format&n=W3wYSQrxLNbU6vlh&q=85&s=21bb2142c117d728ff4afe6ba684deb5" alt="Screenshot 2025-11-03 at 5.55.47 PM.png" width="2144" height="1125" data-path="images/Screenshot2025-11-03at5.55.47PM.png" />
  </Step>

  <Step title="Add another action">
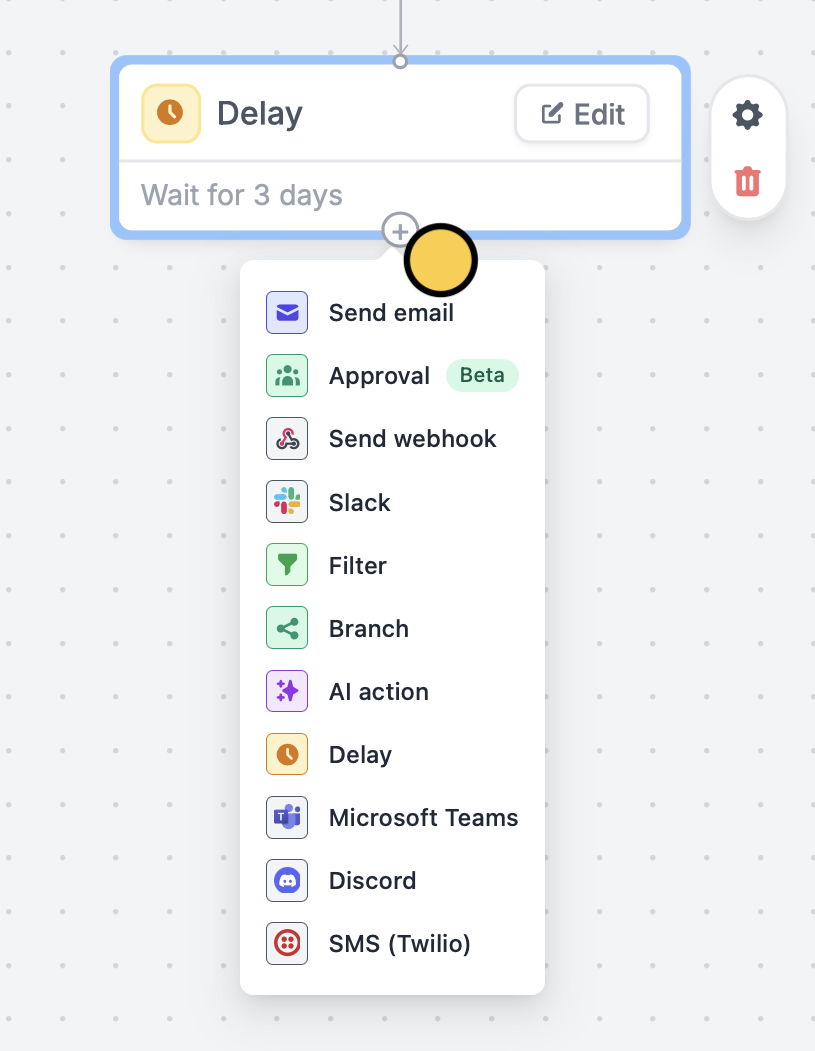
    Click <Icon icon="circle-plus" /> under Delay to add another **action**. For this example, let’s choose `Send email`. We'll email them a list of requirements to submit. Remember to `Test` your workflow.
    <img src="https://mintcdn.com/fillout-005a867b/W3wYSQrxLNbU6vlh/images/Screenshot2025-11-03at5.56.58PM.png?fit=max&auto=format&n=W3wYSQrxLNbU6vlh&q=85&s=df49de365c36289fd87da713be779ccc" alt="Screenshot 2025-11-03 at 5.56.58 PM.png" title="Screenshot 2025-11-03 at 5.56.58 PM.png" style={{ width:"58%" }} width="815" height="1051" data-path="images/Screenshot2025-11-03at5.56.58PM.png" />
  </Step>

  <Step title="Publish and share">
    That’s it! `Publish` and share your form. Now, every form submission will send the custom email to respondents 3 days after completing the form.
  </Step>
</Steps>

## Related articles

<CardGroup cols={3}>
  <Card title="Workflows" color="#FFC738" icon="code-branch" iconType="regular" href="/help/workflows">
    Simplify task flows with native multi-step automations.
  </Card>

  <Card title="Custom emails" color="#FFC738" icon="envelope-open-text" iconType="regular" href="/help/custom-emails">
    Automate sending, pipe previous answers, and style your email.
  </Card>

  <Card title="Scheduling actions" color="#FFC738" icon="circle-calendar" iconType="regular" href="/help/scheduling-workflows">
    Send reminders to yourself and other hosts.
  </Card>
</CardGroup>

<SupportBanner />
