> ## Documentation Index
> Fetch the complete documentation index at: https://fillout.com/help/llms.txt
> Use this file to discover all available pages before exploring further.
# Use custom domains
> Customize your form's URL to match and promote your brand using Fillout. Host your forms at forms.yourcompany.com or any-subdomain.yourcompany.com.
export const SupportBanner = () => {
const titleId = React.useId();
return ;
};
## What is a custom domain?
A **custom domain** is a unique web address to replace your web form's default URL, enhancing brand visibility and trust. It adds professionalism, improves SEO, and ensures a seamless user experience.
## Video tutorial
## How to add a custom domain
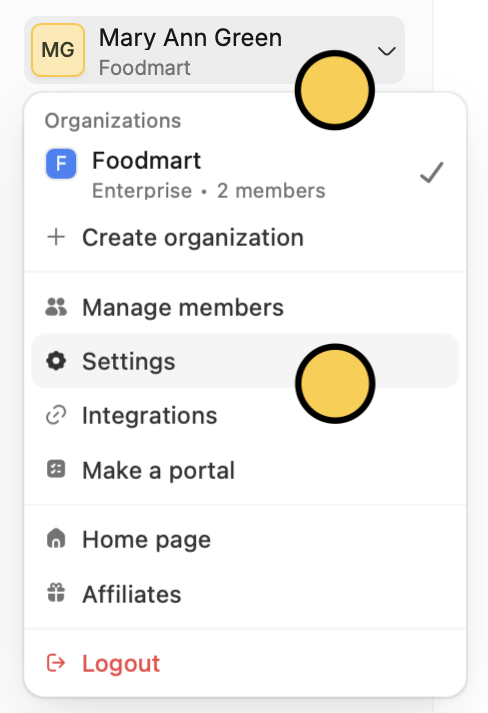
On the Fillout dashboard, click your `Account name` in the upper left corner followed by `Settings`.
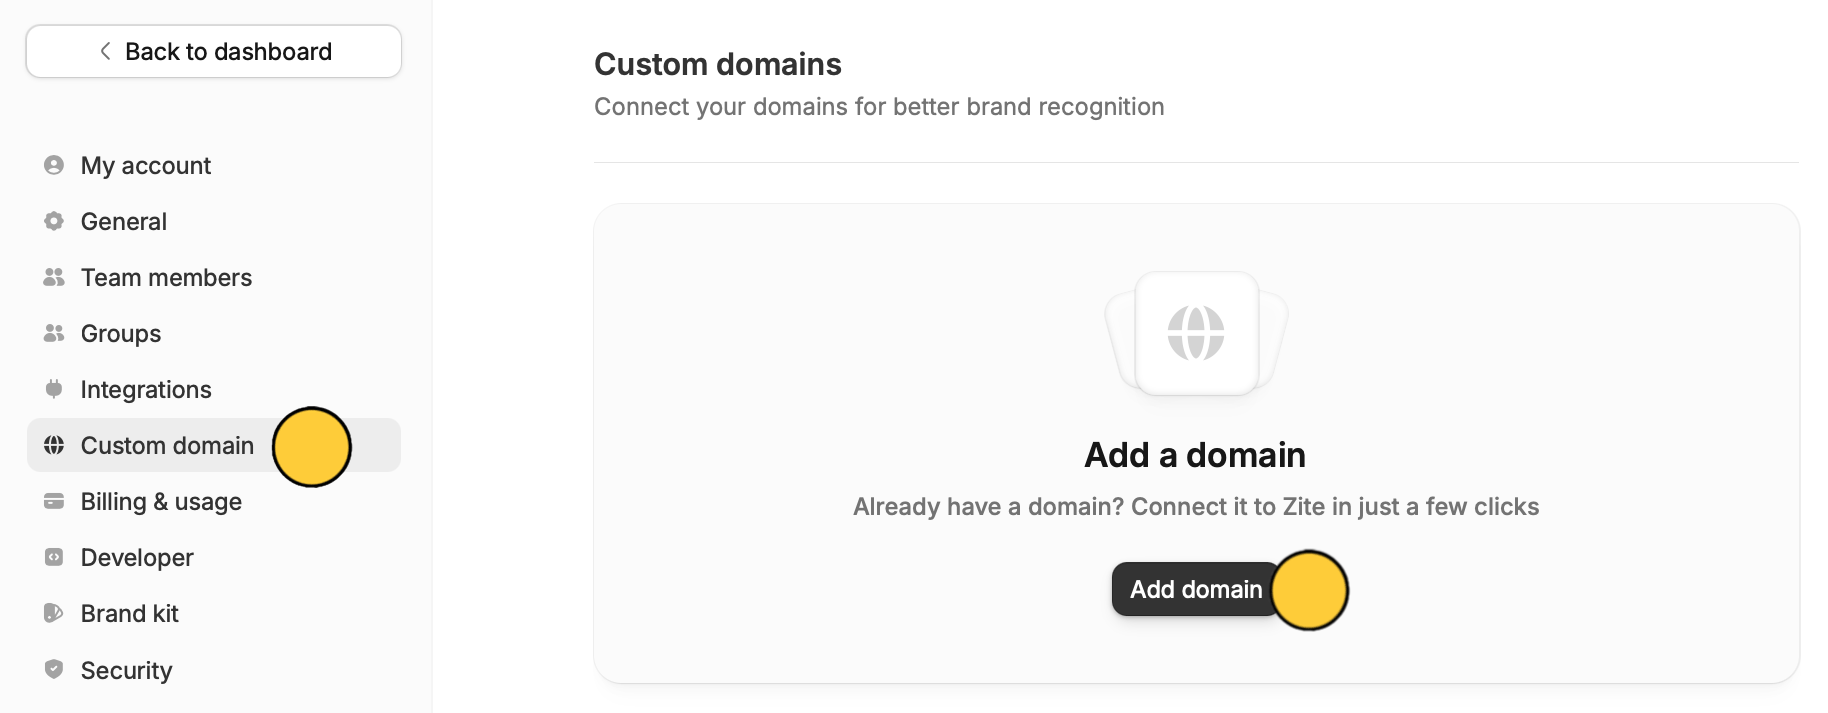
 Navigate to `Custom domain` and click `Add domain`.
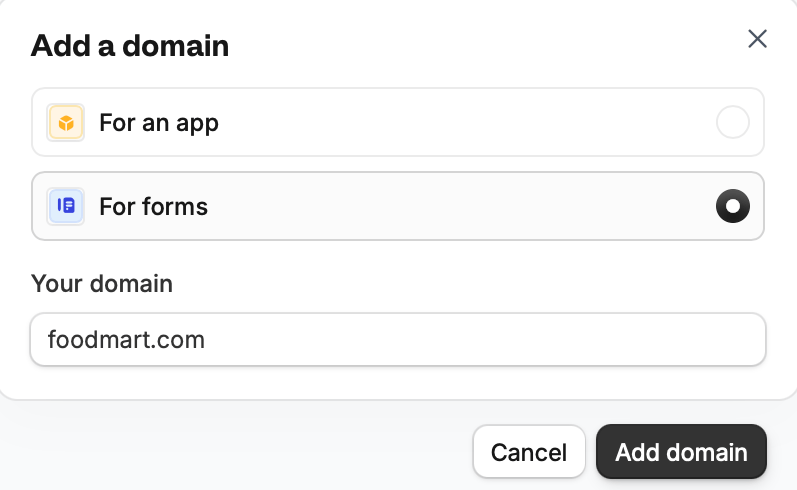
 Choose `For forms` and enter a domain you own.
 1. Log in to your domain provider.
2. Add the CNAME record as instructed in the Fillout dashboard.
3. Wait until the DNS records are verified (this can take anywhere from a few seconds to a few hours). Click Refresh in Fillout to check if your domain has been connected.
You'll know the setup is complete once the **Pending** status is gone.
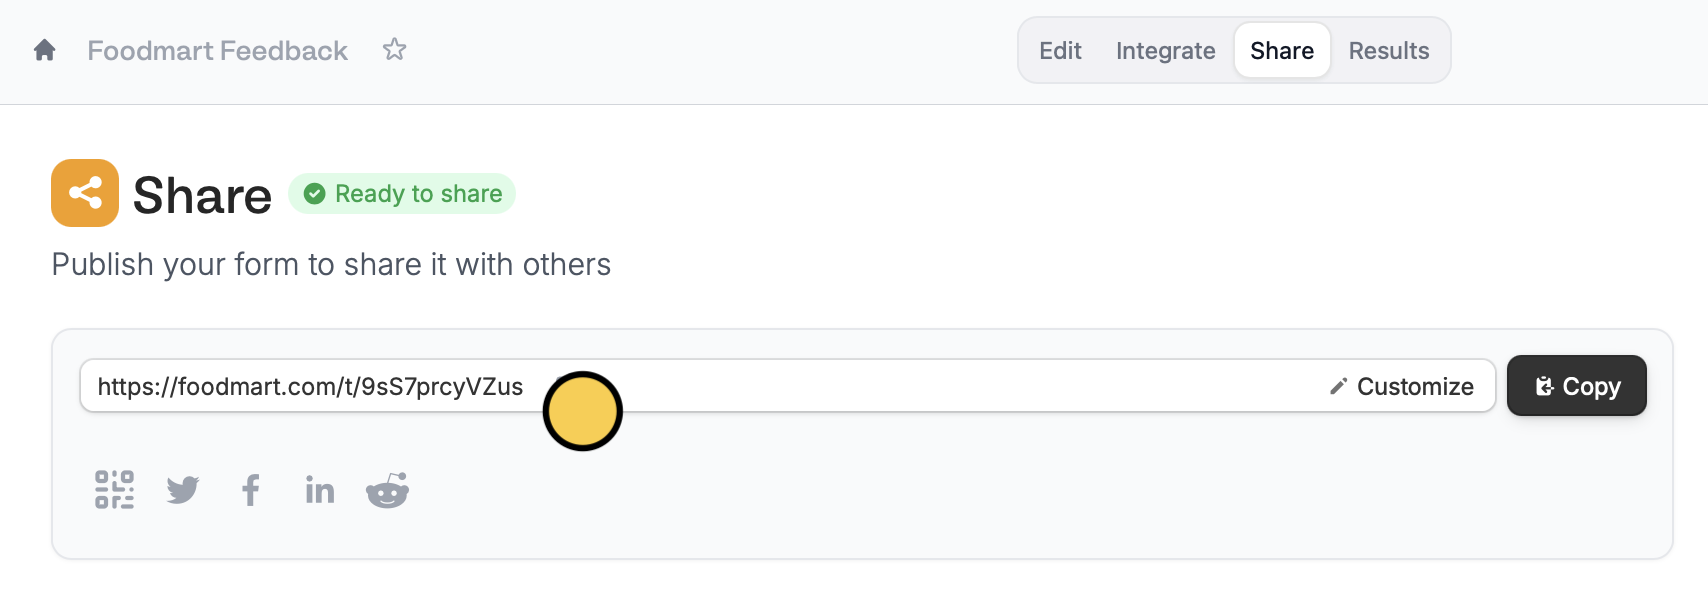
That's it! Now, all your form links will begin with your **domain name**. You can see this in the `Share` page.
1. Log in to your domain provider.
2. Add the CNAME record as instructed in the Fillout dashboard.
3. Wait until the DNS records are verified (this can take anywhere from a few seconds to a few hours). Click Refresh in Fillout to check if your domain has been connected.
You'll know the setup is complete once the **Pending** status is gone.
That's it! Now, all your form links will begin with your **domain name**. You can see this in the `Share` page.
 ## Customize the link ending
You can also change the slug. Check out this quick [guide](https://www.fillout.com/help/custom-link#edit-your-link-ending).
## Custom domain vs. subdomain
A **subdomain** is part of an existing domain. For example, `foodmart.fillout.com` uses "fillout.com" as the main domain, while "foodmart" is the subdomain.
A **custom domain** uses a domain you own, like `foodmart.com`. This lets you share forms under your own brand instead of "fillout.com", creating a more consistent experience for respondents.
## Related articles
Customize your form's share link, subdomain and URL ending.
Add your logo or icon to a browser tab and in link previews.
Remove Fillout buttons on form pages.
## Customize the link ending
You can also change the slug. Check out this quick [guide](https://www.fillout.com/help/custom-link#edit-your-link-ending).
## Custom domain vs. subdomain
A **subdomain** is part of an existing domain. For example, `foodmart.fillout.com` uses "fillout.com" as the main domain, while "foodmart" is the subdomain.
A **custom domain** uses a domain you own, like `foodmart.com`. This lets you share forms under your own brand instead of "fillout.com", creating a more consistent experience for respondents.
## Related articles
Customize your form's share link, subdomain and URL ending.
Add your logo or icon to a browser tab and in link previews.
Remove Fillout buttons on form pages.